Posts

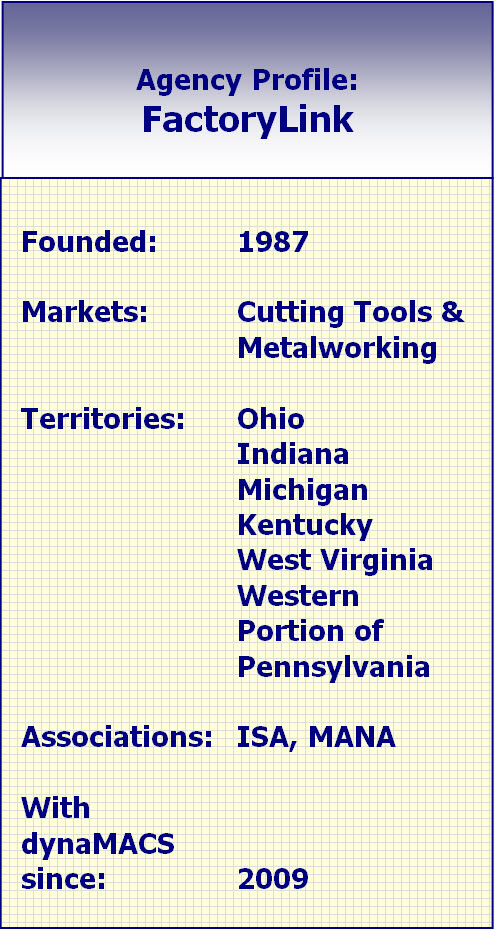
Case Study: FactoryLink

 “dynaMACS helps us grow our business.  It is far superior to other software we’ve used.”

Mark Hauberg
Owner, FactoryLink

Client Challenge

FactoryLink has used its share of sales agency software: Two brand name products and a custom program. But none delivered the reporting, ease of use and detailed data that FactoryLink required.

“Reporting required sorting through reams of paper. We couldn’t dissect data in meaningful ways,” says Owner Mark Hauberg. Our custom software worked when the agency was smaller, but as we grew, it didn’t meet our needs. We were frustrated with the products and knew there had to be better software available.”

FactoryLink_StatisticsdynaMACS Solution

As Hauberg began the search, he saw a demonstration of dynaMACS at a trade show and was impressed. “dynaMACS is far superior to what we’d used in the past. It fit the bill,” Hauberg says. FactoryLink found the sales and commission software that matched how the busy agency operates.

With the ability to “cut and dice” information and look at various aspects of sales and commissions, he says, “Information is power, and dynaMACS delivers. It helps us grow our business.”

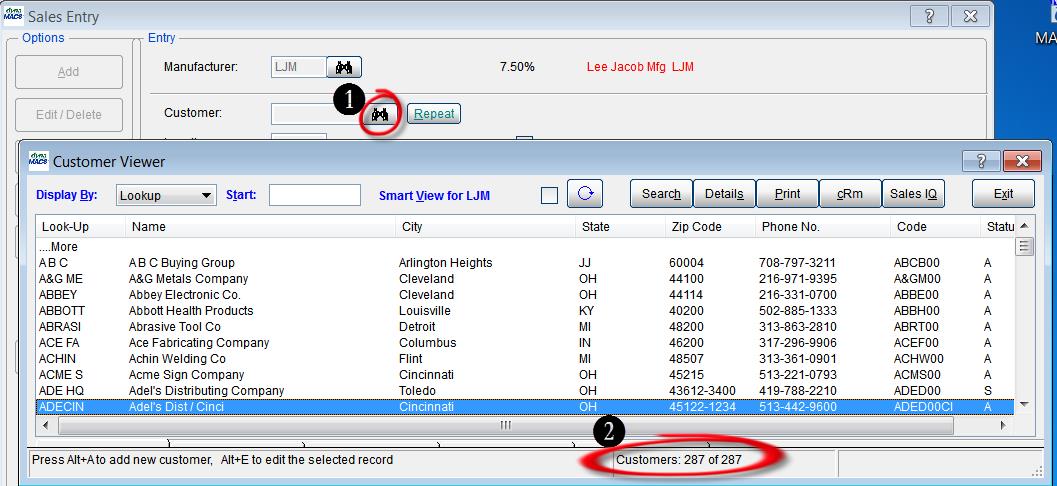
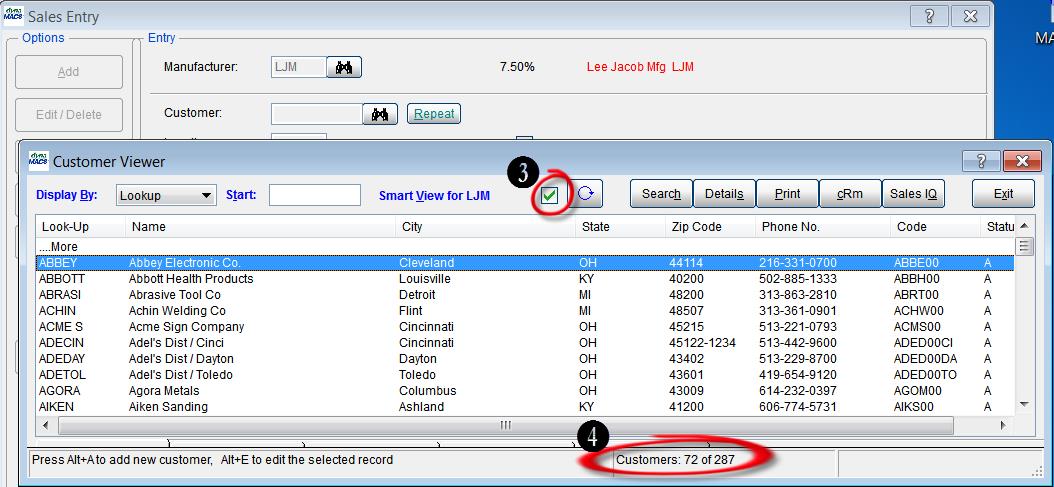
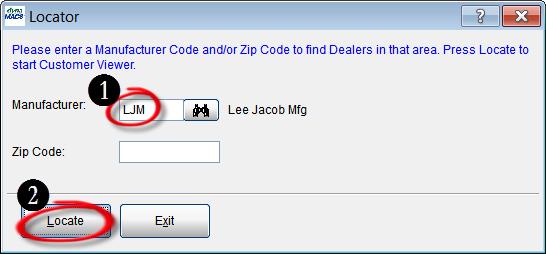
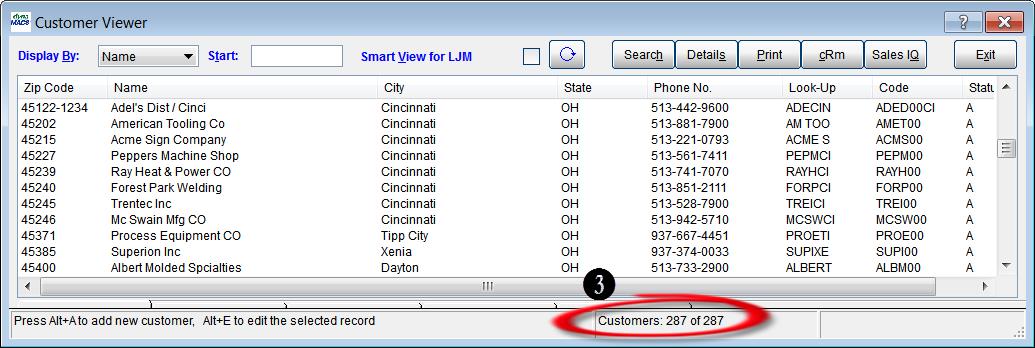
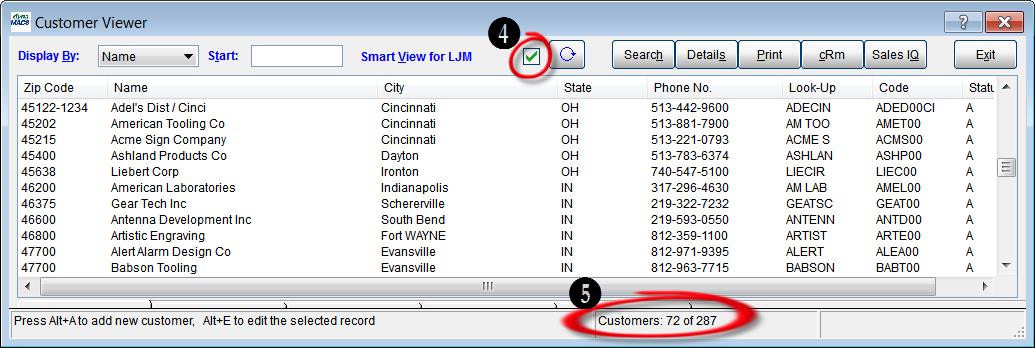
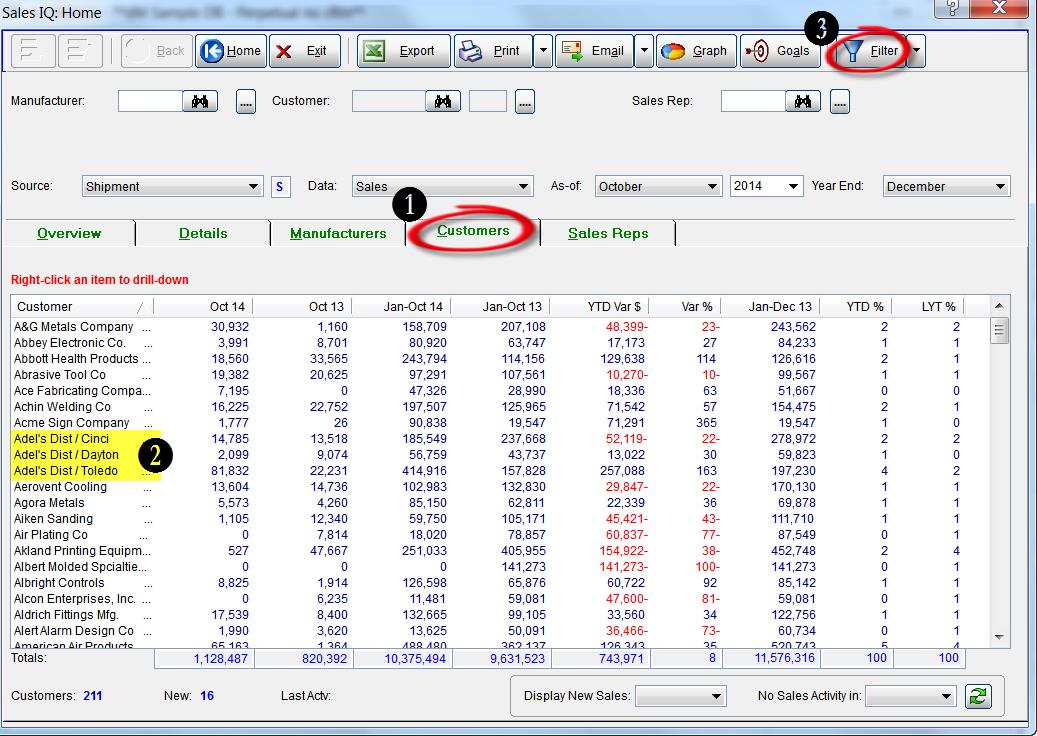
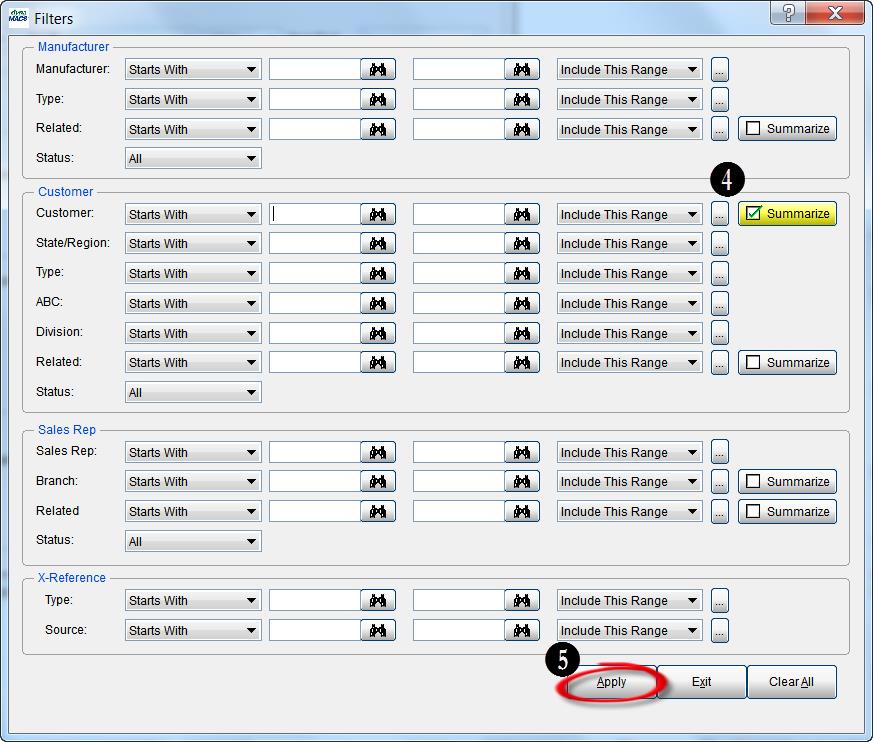
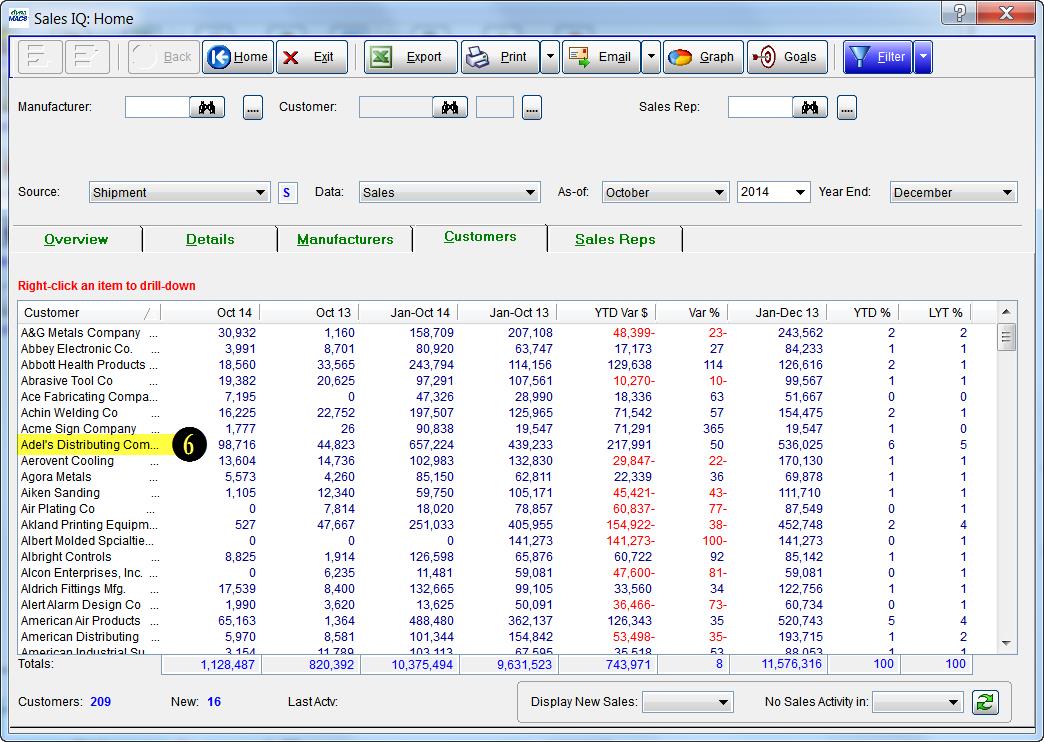
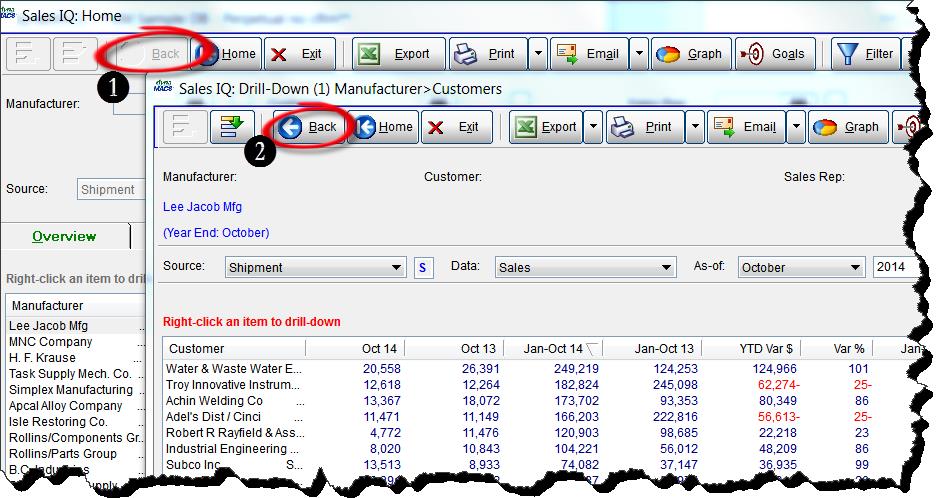
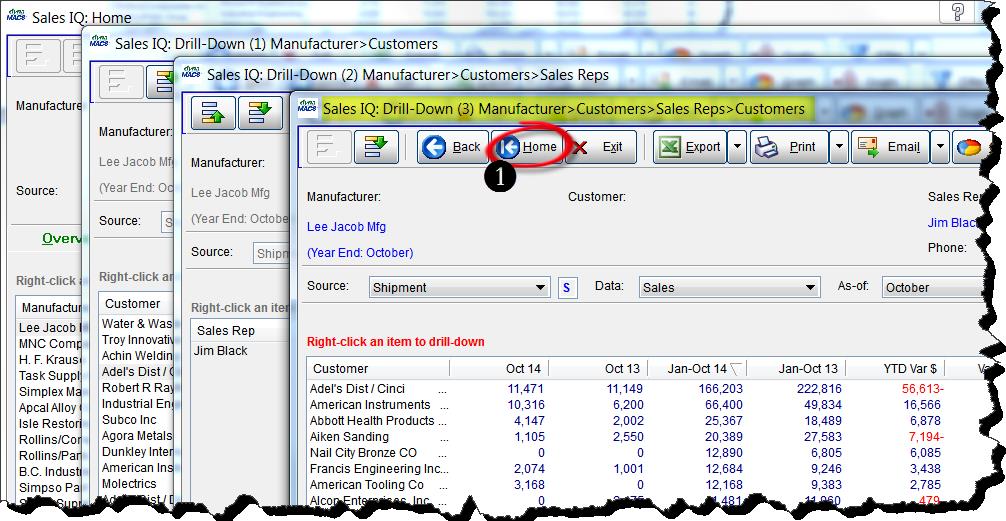
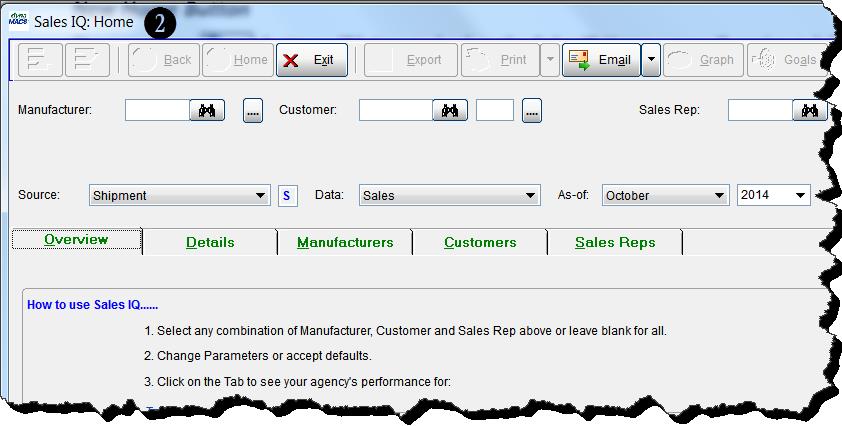
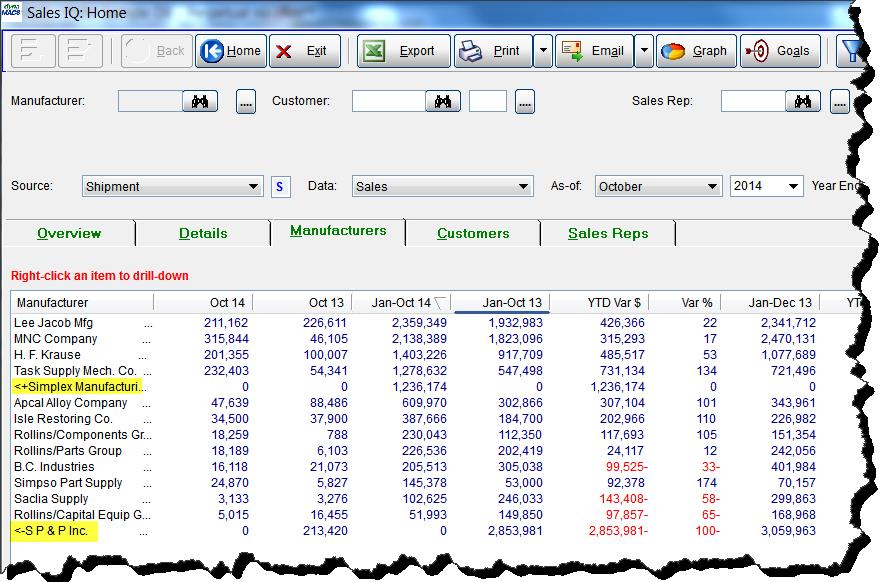
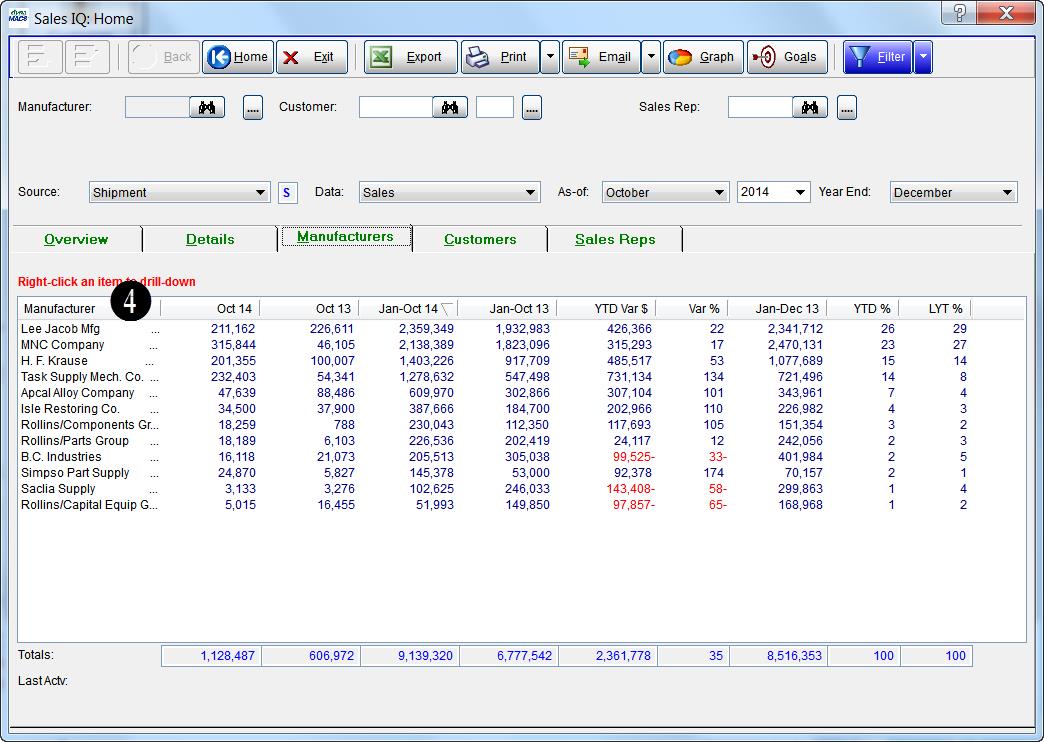
With Sales IQ, dynaMACS’ powerful performance analysis tool, Hauberg can instantly view data in hundreds of combinations such as:

Sales by territory

Customer and sales rep performance

    • 5-year sales history for any manufacturer
    • All manufacturers, sequenced by year-to-date sales
    • Monthly data for the entire agency, by any combination of manufacturer, customer or sales rep
    • Commissions paid
    • Low-performing areas with opportunities for growth


Hauberg also appreciates that reps get information as soon as it is in the agency’s system. “It helps me manage my sales force. It’s the best choice and has been a wonderful change for the business.”

Tip #1411 – Using Smart View in dynaMACS

 Smart View is a feature in dynaMACS that lets you view customers with sales history for a selected manufacturer.  This feature is available from the Sales Entry and the Locator screen.

Example of Using Smart View in Sales Entry

    1. From the Sales Entry screen with a manufacturer selected (the manufacturer LJM has been selected for this example), click on the Customer Search button to display the list of ALL customers.
    2. Notice that in this example there are 287 customer records.Sales Entry - Cust Viewer 1
    3. Click on the Smart View check box to display only customers with history for this manufacturer.
    4. Notice that in this example there are now only 72 customer records displayed.  These are the customers with sales history.Sales Entry - Cust Viewer 2

Example of Using Smart View from the Locator

      1. From the Locator screen enter a manufacturer code i.e. LJM.
      2. Select the Locate button.Locator
      3. Notice that in this example there are 287 customer records.  This displays ALL customers.Customer Viewer 1
      4. Click on the Smart View check box to display only customers with history for this manufacturer.
      5. Notice that in this example there are now only 72 customer records displayed.  These are the customers with sales history for Lee Jacob Mfg.Customer Viewer 2

Tip #1409 – Using Customer Locations in dynaMACS

Some agencies have the need to separate sales numbers within a customer for reasons such as:

  • Multiple buyers that are responsible for making buying decisions for different manufacturers
  • Giving credit to different reps for something shipping to a different location
  • For these purposes, dynaMACS gives you the ability to add multiple locations to a customer.  If locations are used, you can use the Filters feature to display these numbers in Sales IQ summarized, displaying them as combined under one customer, or you can display the sales numbers for the individual locations.

Filtering on Locations in Sales IQ

When displaying sales activity for a customer in Sales IQ you can view all sales activity by customer location (default) or you can summarize sales by using the Filter button.

In the following example we will look at the customer Adel’s Dist which has three locations.

  1. From the Sales IQ Home screen the Customer tab has been selected showing all customers and the sort is on the Customer column.
  2. You can see that there are three Adel’s customers displayed by individual locations.
  3. Select the Filter button.Sales IQ Home Screen 1
  4. Check the Summarize box to the right of the Customer field.
  5. Select the Apply button.Filters Screen 1
  6. The Sales IQ screen now displays all Adel’s locations summarized and totaled.Sales IQ Home Screen 2

To Create a Customer Location

The following example explains how to add a location to an existing customer.

  1. Select the Viewer icon.
  2. Select the Customer icon.dynaMACS Home Screen
  3. Highlight the Customer that you will be adding a location to.
  4. Select the Add Location button.Customer Viewer Screen 1
  5. In the Customer Maintenance screen you will notice that the customer information from the selected customer will be defaulted i.e. the address, phone #’s, etc.  Make any changes required for your new location and select the Save/Exit button.NoteCustomer Maintenance Screen
  6. The newly added location is displayed in the Customer Viewer list.
    Customer Viewer Screen 2

Tip #1408 – The Sales IQ Top Row Button Operation has Changed in Version 2013

We have redesigned and rearranged the buttons on the dynaMACS Sales IQ screen to make navigation easier and more intuitive.  There are two new buttons on the Sales IQ Home screen, the Back button and the Home button.  You will also notice that some of the buttons have a different cosmetic look.

Old Screen . . .

Old Screen Buttons

New Screen . . .

New Screen Buttons

New Back Button

The new Back button is active on any “Drill-Down” screen.  Drill-Down screens are accessed by right clicking on a record and selecting Show Manufacturers, Show Customers, Show Sales Reps or Show Details from the Manufacturers, Customers or Sales Reps tabs in Sales IQ (Sales IQ Drill-Down).  The Back button will take you back to the previous Sales IQ screen.

  1. Notice that the Back button is disabled in the Sales IQ Home screen in the example below.  We selected the manufacturer Lee Jacob Mfg, right clicked and selected Show Customers.
  2. In the Sales IQ Drill Down screen you will see that the Back button is now activated.  By selecting this button you will be returned to the previous screen (Sales IQ Home).SIQ Screen 1

New Home Button

The new Home button will close all of the Drill-Down screens and bring you back to the Sales IQ Home screen Overview tab.

  1. In the following example we have selected the Home button from the 3rd Sales IQ Drill Down screen.SIQ Screen 2
  2. After selecting the Home button you will be returned to the Sales IQ Home screen.SIQ Screen 3

Saving Sales IQ Filters

The Sales IQ Filters are now saved after exiting Sales IQ.  You can access the saved filters by toggling between Filtered data and Normal data.

SIQ Screen 4

Case Study: Conveying & Power Transmission Solutions (CPTS)

 “Having real-time data available wherever and whenever we need it has greatly improved the way we operate.”

Vicki Cockerham, General Manager
Conveying & Power Transmission Solutions

Client Challenge

Conveying & Power Transmission Solutions (CPTS) had some major issues with their prior sales and commission software. It was difficult to use, manual data entry took over a week and reports couldn’t be exported. “We needed software that helped us operate more efficiently, while also providing sales reps a way to access data while on the road,” says General Manager Vicki Cockerham. “It was time to find a solution that better fit our needs.”

CPTS_StatisticsdynaMACS Solution

When CPTS was introduced to dynaMACS, they saw that the software had extensive reporting capabilities, yet was surprisingly easy to use. As an added bonus, dynaMACS saved the agency days of manual data entry time and ensured everyone could access information from anywhere, anytime.

Three powerful features work together to deliver the complete solution that CPTS was looking for:

dynaMACS Mobile: Sales reps have mobile access to data anywhere they go: On the road, at a client office or home – anytime they need it. Information is always there.

Cloud: Not only can reps access the information, but because CPTS processes on the cloud, reps can see real-time information data from most smart devices. As the agency enters data, the data is uploaded to the cloud and reps can see the very latest sales information.

Reporting: The reporting process has done a complete 180°. From reports that couldn’t be exported and were difficult to generate, to present day, in which reports are generated in seconds. dynaMACS converts raw data into useful information.  The agency can choose from pre-defined reports or custom reporting options. Saving even more time, the reps can run reports themselves, rather than having to call the office.

Access to real-time data, anytime and anywhere has forever changed the way the agency runs its business.

Tip #1407 – Evaluating True Agency Performance

Often times an agency picks up new lines and also loses lines.  When looking at sales numbers in Sales IQ, these numbers can often be distorted when you display both new manufacturers and lost manufacturers along with your active manufacturers.  The following examples will help you to identify your true sales numbers by excluding these manufacturers.  Also, modifying the manufacturers name with a symbol provides a quick visual when displaying all manufacturers in a list.

Classifying a Manufacturer Status

When adding a manufacturer the status is set to “New” by default.  Once a “New” manufacturer has met the agency’s requirements for categorizing the manufacturer as “Active”, the status should be updated.   Many agencies make this change after 1 year.  The following example shows how to change a manufacturer’s status.

  1. From the Manufacturer Maintenance screen, select Active from the drop down list in the Status field.
  2. Select the Save button and then the Exit button.Manufacturer Maint Screen

Adding a Symbol to the Manufacturer Name for an Easy Visual of New or Lost Lines

For a quick visual of “New” or “Lost” lines in your Sales IQ display list, you can modify the manufacturer name with a symbol that is easily identifiable such as “<-“ for a lost manufacturer or “<+” for a new manufacturer.   Once you change the status from “New” to “Active”, then you can remove the symbol from the manufacturer.

Note_Tip1407

In the following example you can see the new manufacturer Simplex Manufacturing which has the “<+” in front of the name and you’ll see that there are sales in the column Jan-Oct14 but no sales in previous years.  You will also see the inactive manufacturer S P & P Inc. which has the “<-“ in front of the name and no sales in Oct 14 or this YTD Jan-Oct 14  but sales in previous years indicating a lost manufacturer.

Sales IQ Screen 1

Excluding New and Inactive (lost) Manufacturers from the Sales IQ Display

You can remove “New” and “Inactive” manufacturers from the Sales IQ display by using the Filters button in Sales IQ.  This method will remove these sales numbers from the display showing you only the agency sales for “Active” manufacturers eliminating the new and lost lines.

  1. Select the Filter button from the Sales IQ screen.Filters Screen 1
  2. From the Filters screen select Active from the Status drop down list under Manufacturer.
  3. Select the Apply button.Filters Screen 2
  4. After filtering you can see that only ”Active” manufacturers are displayed in the Sales IQ screen.Sales IQ Screen 2