Posts

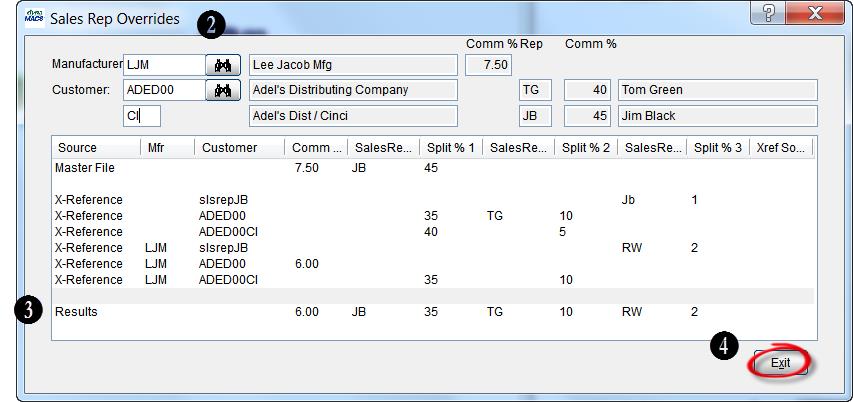
Tip #1607 – Transferring Sales and Commissions History for a Specific Manufacturer and Customer to a Different Sales Rep

In our previous Tip #1606 we discussed how to automatically give a sales rep that is not currently assigned to a particular customer, credit for sales based upon the manufacturer. This tip is a follow up which discusses how to transfer the sales and commission history for the manufacturer/customer after making that override.

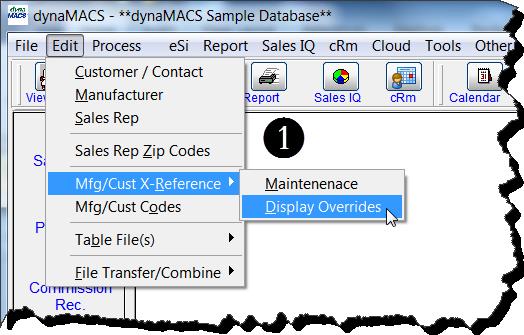
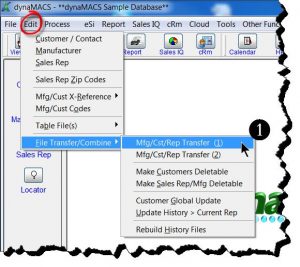
  1.  From the main dynaMACS screen select Edit>File Transfer/Combine>Mfg/Cst/Rep Transfer (1).dynaMACS Main Screen
  2. If you are prompted to Create Restore Point always answer “Yes” and enter a good Description for your restore point.  In this case we will enter “Moving History from JB to RW”.
  3. Select the Proceed button.Create Restore Point Screen
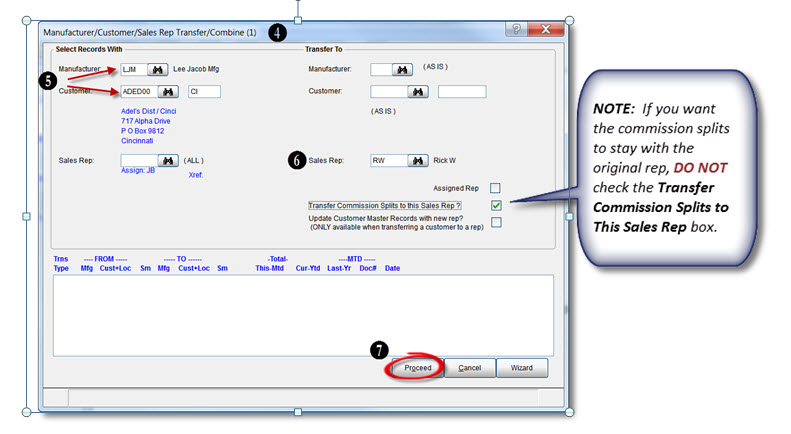
  4. When the Create Restore Point is complete the Manufacturer/Customer/Sales Rep Transfer/Combine (1) screen is displayed.
  5. On the left side (under Select Records With) enter the Manufacturer code and then the Customer code.
  6. On the right side (under Transfer To) enter the new Sales Rep code and check the Transfer Commission Splits to this Sales Rep box if you want to transfer the splits to the new rep. (See Note below)
  7. Select the Proceed button and then select Yes at confirmation to print your Audit       Report.  Be sure to choose print to PDF as the file may be quite large.Transfer Combine Screen
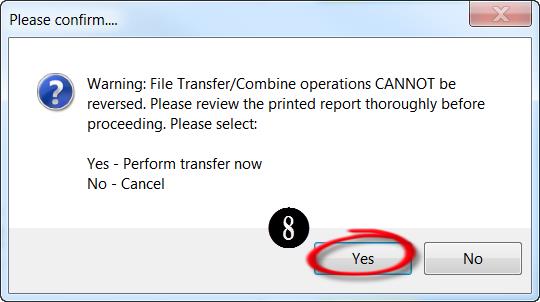
  8. At the Please Confirm dialog box select the Yes button if everything is correct on the Audit Report to continue with the transfer.Please Confirm Screen
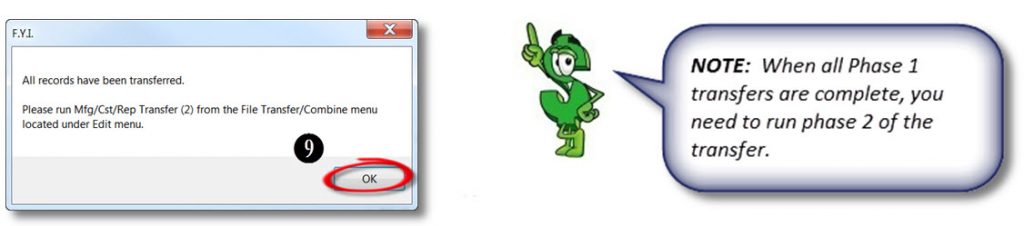
  9. Select the OK button from the F.Y.I. dialog box.Ok_FYIConfirmationRepeat steps 4 through 9 for as many transfers as needed.

Tip #1304 – Have you ever gotten stuck during sales entry not knowing where a sales rep override is coming from?

Overrides button during sales entry to view the hierarchy of sales rep overrides for the selected customer and then continue with your sales entry.  Sales rep overrides are generated from the X-Reference records.  An established “hierarchy” is used to determine which X-Reference record overrides another. The sales rep override screen shows all the X-Reference records used to determine the final override results.

To View Overrides During Sales Entry:

  1. During the sales entry process you can view the source of a sales rep override if present. To do so, simply select the Overrides look up button in the Sales Entry screen.

    NoteSales Entry Screen

  2. When this button is selected, the Sales Rep Hierarchy (or Overrides) screen is shown. This screen will display the order in which the existing overrides are processed from top to bottom.
  3. The bottom value in each column (being the final override results) is summarized in the Results row in this screen.
  4. Select the Exit  button to return to the Sales Entry screen where you left off and so you can continue with your sales entry.Sales Rep Overrides Screen 1

To View Overrides From the Main dynaMACS Screen:

  1. To view the Sales Rep Overrides, from the dynaMACS main screen select Edit>Mfg>Cust X-Reference>Display OverridesdynaMACS Main Screen
  2. The Sales Rep Hierarchy (or Overrides) screen is shown. This screen will display the order in which the existing overrides are processed from top to bottom.
  3. The bottom value in each column (being the final override results) is summarized in the Results row in this screen.
  4. Select the Exit button to close the Sales Rep Overrides screen.Sales Rep Overrides Screen 2