Posts

Tip #1702 – Organizing Your Agency Workflow to Accommodate all the Various Manufacturers

One of the many challenges sales agencies face is dealing with the many forms and documents received from each of the manufacturers that the agency represents. Whether a document gets entered into dynaMACS, QuickBooks or just filed, it is helpful to document the process for each unique manufacturer document received.  We suggest that you create a binder with a tab for each manufacturer and use the form below (or something similar) for each document.

Create a Binder

  1. Set up a binder with a tab for each manufacturer.
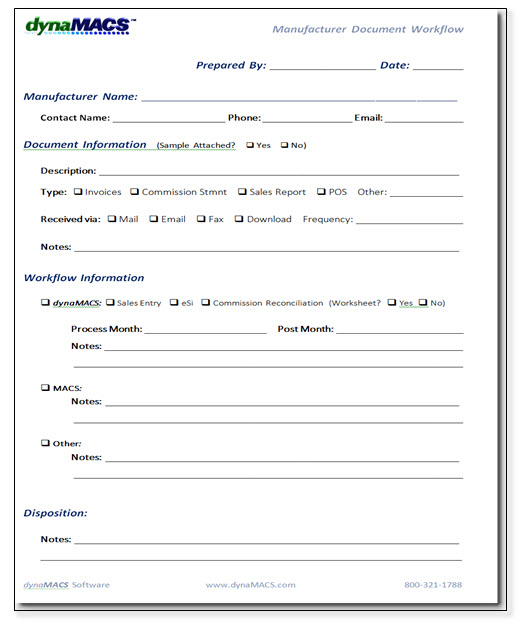
  2. Behind each tab you should have the dynaMACS Manufacturer Document Workflow Worksheet (example below) and examples of all other documents you receive from the manufacturer.
    Example:
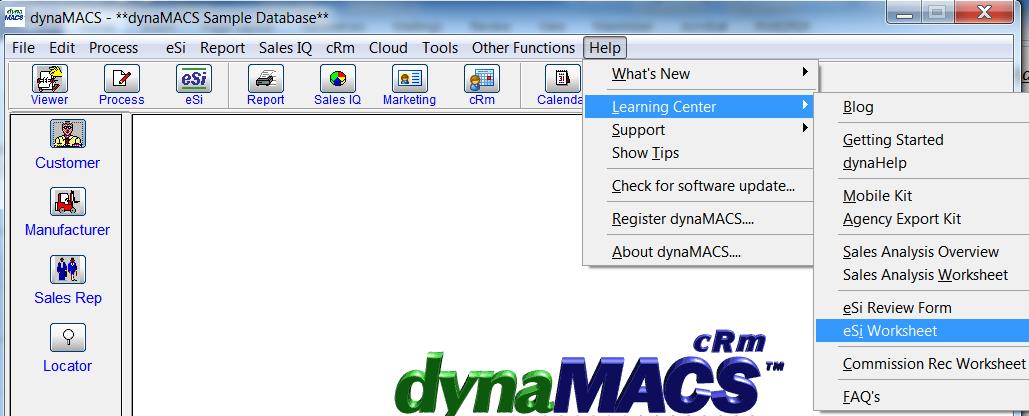
    To obtain copies of this worksheet and all other dynaMACS worksheets go to Help>Learning Center from the dynaMACS Main Screen.  You will also find them in the dynaMACS Implementation Kit that you receive upon purchasing your software.

Tip #1607 – Transferring Sales and Commissions History for a Specific Manufacturer and Customer to a Different Sales Rep

In our previous Tip #1606 we discussed how to automatically give a sales rep that is not currently assigned to a particular customer, credit for sales based upon the manufacturer. This tip is a follow up which discusses how to transfer the sales and commission history for the manufacturer/customer after making that override.

  1.  From the main dynaMACS screen select Edit>File Transfer/Combine>Mfg/Cst/Rep Transfer (1).dynaMACS Main Screen
  2. If you are prompted to Create Restore Point always answer “Yes” and enter a good Description for your restore point.  In this case we will enter “Moving History from JB to RW”.
  3. Select the Proceed button.Create Restore Point Screen
  4. When the Create Restore Point is complete the Manufacturer/Customer/Sales Rep Transfer/Combine (1) screen is displayed.
  5. On the left side (under Select Records With) enter the Manufacturer code and then the Customer code.
  6. On the right side (under Transfer To) enter the new Sales Rep code and check the Transfer Commission Splits to this Sales Rep box if you want to transfer the splits to the new rep. (See Note below)
  7. Select the Proceed button and then select Yes at confirmation to print your Audit       Report.  Be sure to choose print to PDF as the file may be quite large.Transfer Combine Screen
  8. At the Please Confirm dialog box select the Yes button if everything is correct on the Audit Report to continue with the transfer.Please Confirm Screen
  9. Select the OK button from the F.Y.I. dialog box.Ok_FYIConfirmation
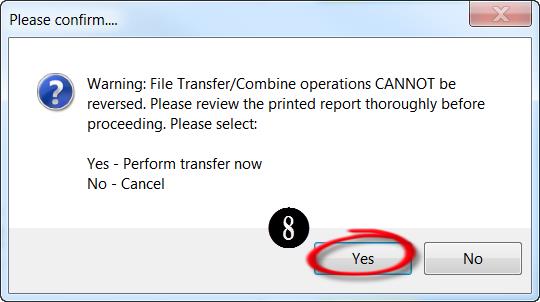
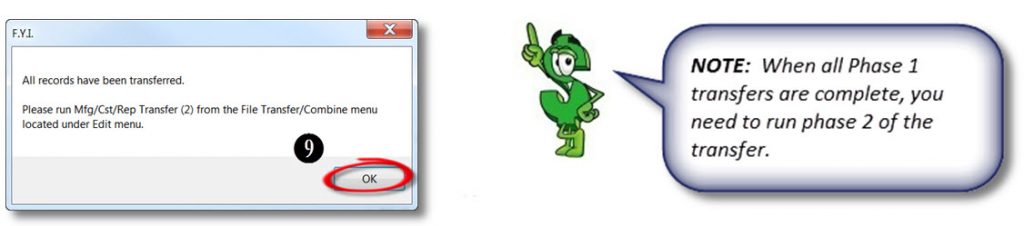
Repeat steps 4 through 9 for as many transfers as needed.

Tip #1211 – Using Data Field in Sales IQ to help analyze sales and commissions. . .

dynaMACS Sales IQ has a unique way of analyzing sales and commissions which allows you to change the data that is displayed in Sales IQ in order to view it several different ways. This tip will show you how to use this data field and also what data fields are displayed for each Data Type option.

Using the Data Type Field

In the following example we show data for Sales and RepSplits listed by sales rep as of October 2012. This allows you to examine sales by each sales rep and what commissions have been paid to each sales rep.

  1. From the dynaMACS main screen, select the Sales IQ button.
  2. Select Sales + RepSplits from the Data drop box list.
  3. Select October from the As-of drop box list.
  4. Select the Sales Reps tab.
  5. >The columns in blue represent sales numbers for each sales rep.
  6. The columns in green represent commissions paid for each sales rep.SIQ Home

Data Type Descriptions

The following chart explains each Data type available and what will be displayed on the Sales IQ screen when selected.

Data_Spreadsheet