Posts
Tip #1605 – Analyze Sales & Commission data for Multiple Customers in a specific Buying Group
By relating customers to a “buying group” customer, you can analyze the combined sales and commission totals for all the related customers. In addition, you can summarize the buying group into one total while looking at all your customers by selecting the summarize box next to the customer Related field for the filter.
Relating Customers
- From the Customer Viewer screen highlight the customer to be related and select the Edit button.
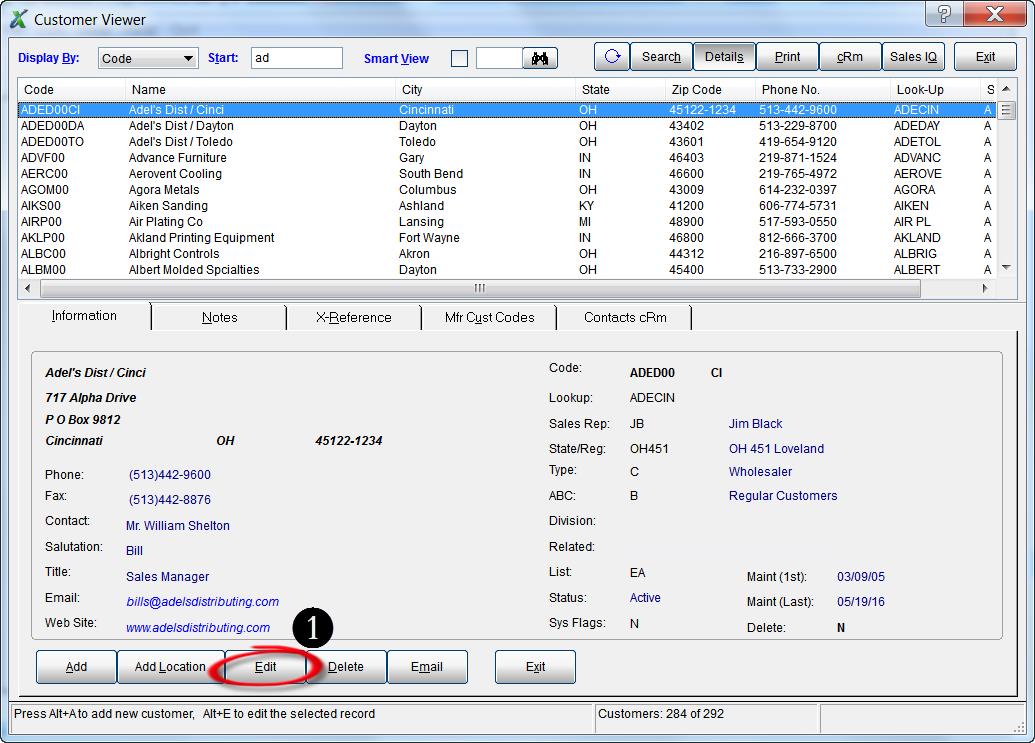
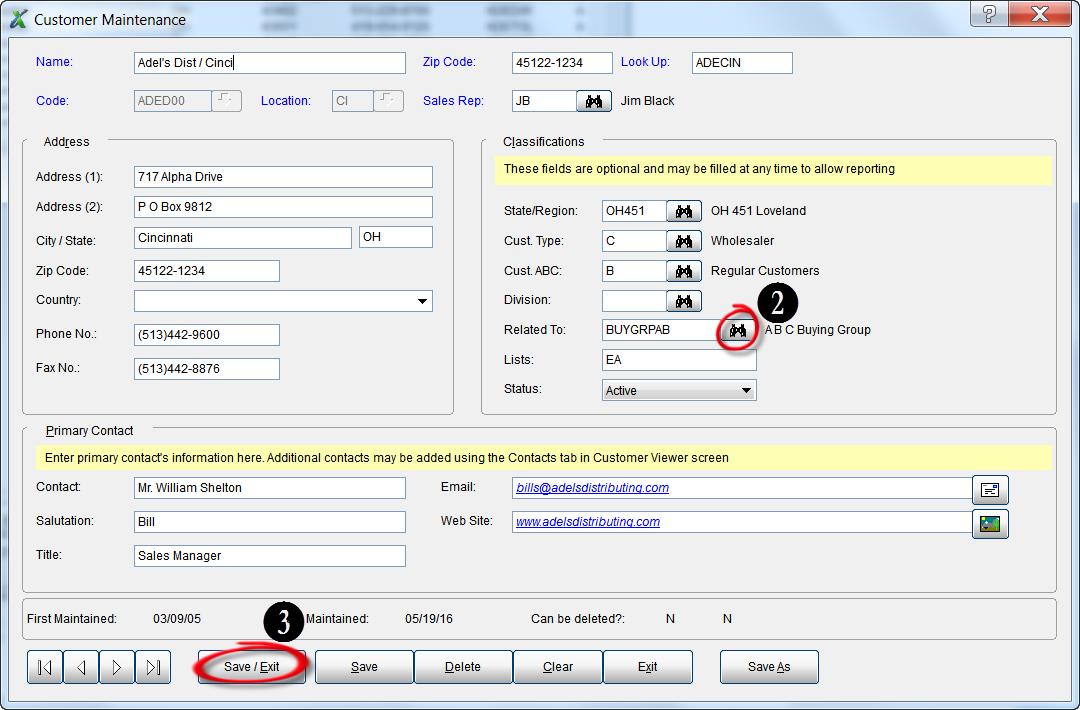
- In the Related-To field enter the Customer Code to relate this customer to or search for the customer code by using the Binoculars button.
- Select the Save/Exit button.
Filter Sales IQ to See Related Customer Activity
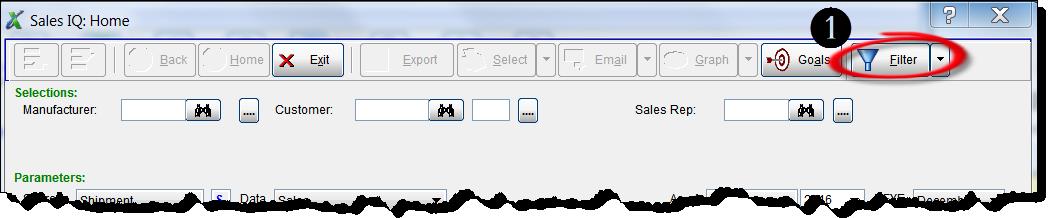
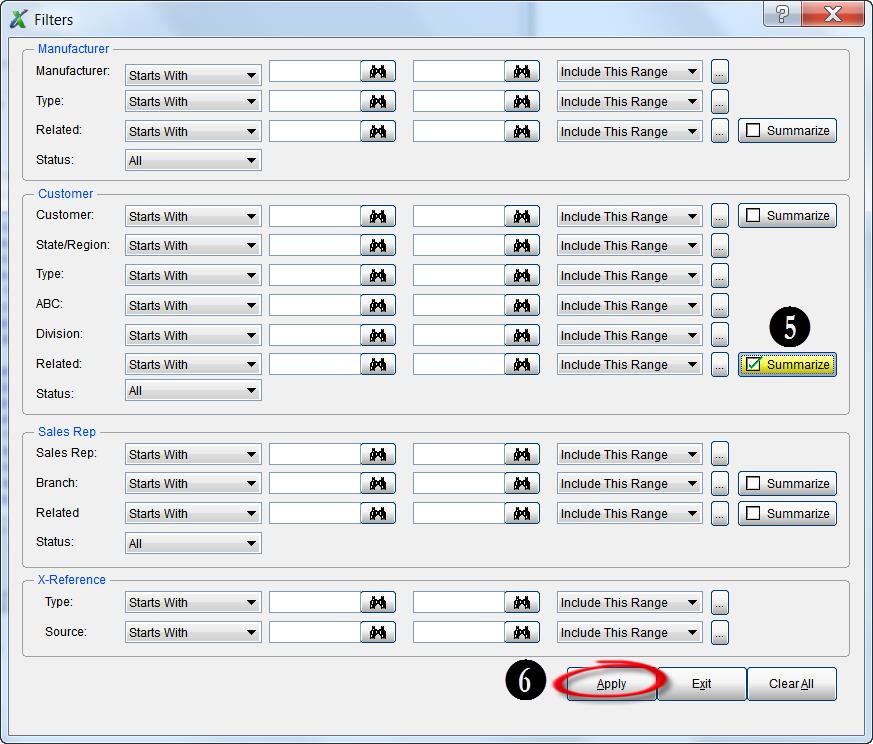
- From the Sales IQ screen select the Filter button.
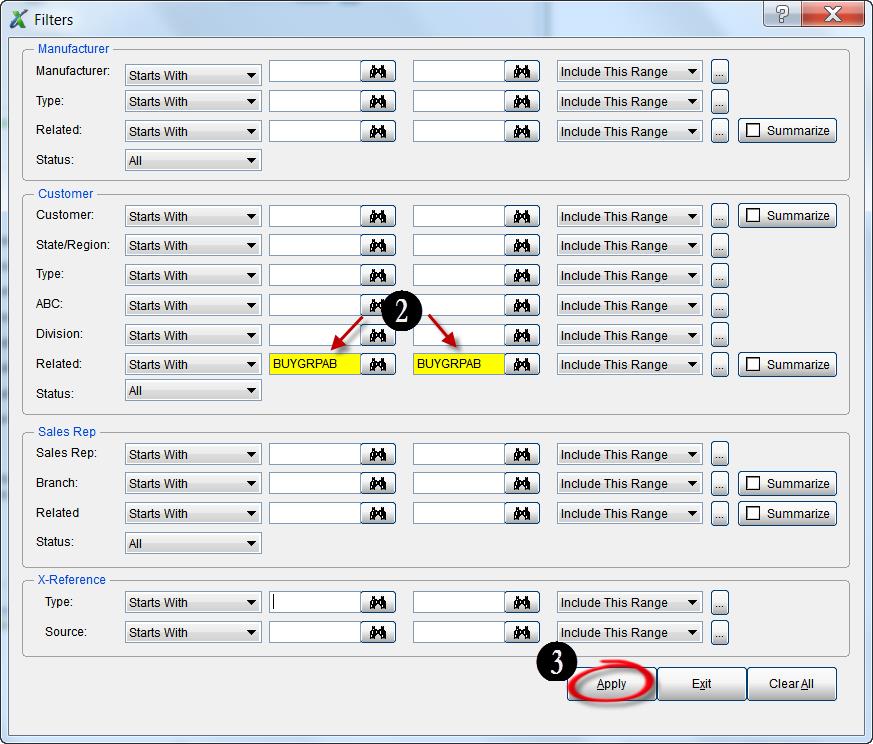
- In the Filters screen enter the Related customer code in the Starts With and Ends With fields. In this example we are using ABC Buying Co (customer code BUYGRPAB). You can search for the customer code by using the Binoculars button.
- Select the Apply button.
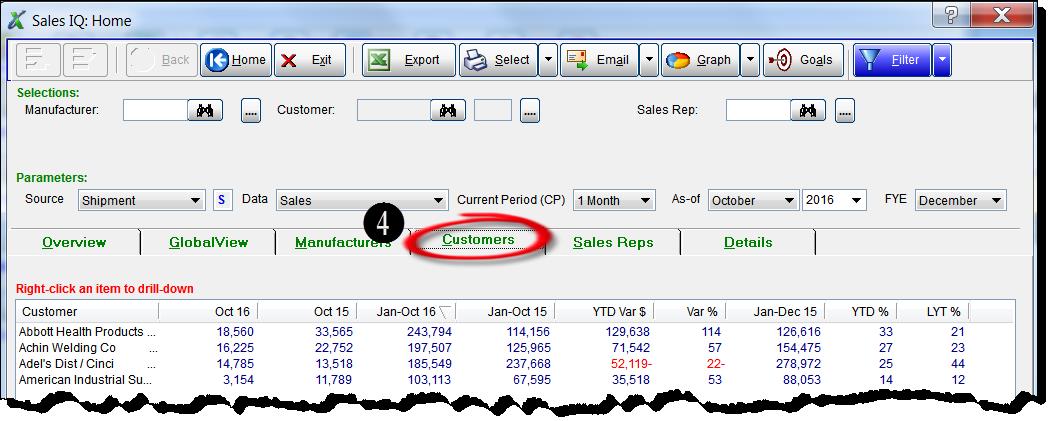
- The Sales IQ Home screen will appear. Select the Customer tab. The detailed activity for those customers related to ABC Buying Group will be displayed.
- If you would prefer to see summarized information, go back to the Filters and select the Clear button and then the Summarize button to the far right of the Customer Related field.
- Select the Apply button.
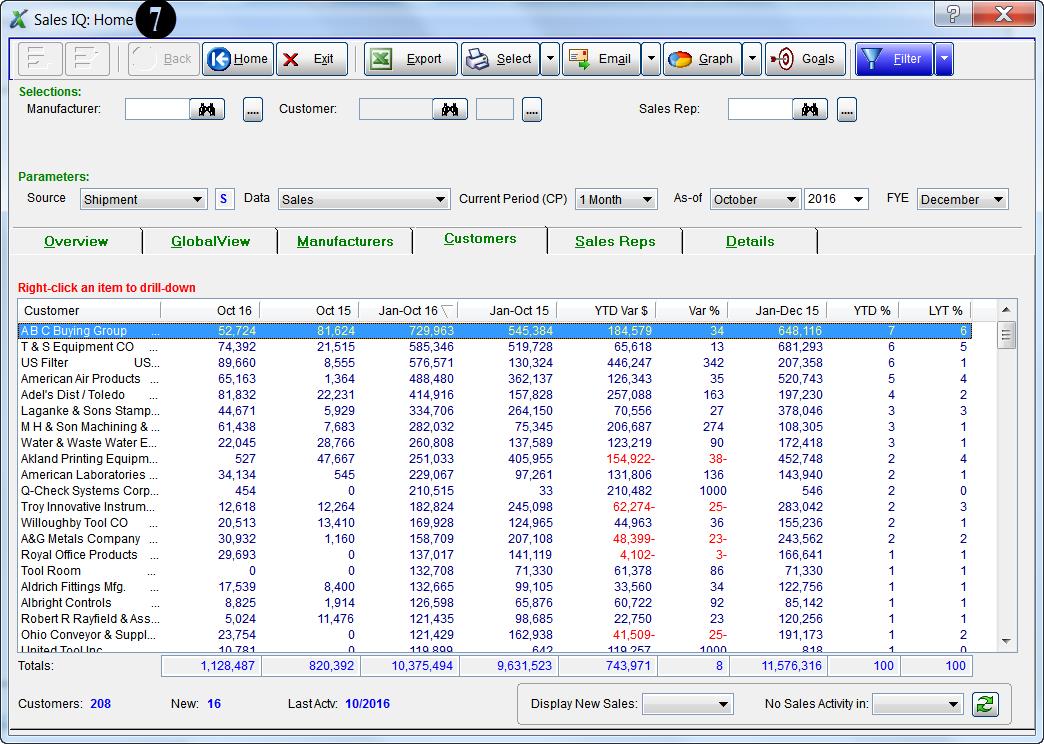
- The Sales IQ Home screen will appear with the summarized activity for all customers. You will notice the ABC Buying Group summarized on the first line highlighted below.
Case Study: RWA
“Data entry time takes a fraction of what it used to. Manually entering thousands of lines of data took a week. With dynaMACS we’re done in 15 minutes.”
Mary Elizabeth Faulkner
RWA
 Client Challenge
RWA sales agency was using sales and commission software that had some basic functionality, but wasn’t delivering the level of information the agency needed to analyze performance and uncover ways to grow the business.
The agency was introduced to dynaMACS at a trade show when the President and CEO of RWA, Ron Wallace, as speaking to a colleague from another agency. Talk turned to sales and commission software and the other agency highly recommended the software they used, which was dynaMACS.
 dynaMACS Solution
RWA did some research and found dynaMACS to be a powerful sales and commission tool with the ability to analyze sales, pay reps, track commissions and access in-depth reporting.
Mary Elizabeth Faulkner supports the salespeople from the main office and says, “Reps get information that can be shown by manufacturer, distributor and much more. They always know what’s happening in their territory.”
Comprehensive reporting is essential for any agency. “dynaMACS shows meaningful, easy-to-understand reports that provide us vital information,” she says. The agency can sort and filter for more in-depth data and analyze the business in numerous ways.
RWA also reconciles manufacturer commission statements and runs reports to pay the sales reps. With dynaMACS eSi, the agency imports manufacturers’ sales invoices and reports electronically, with minimal manual processes. “Data entry time takes a fraction of what it used to. Entering thousands of lines of data manually took a week. With dynaMACS we’re done in 15 minutes.”
RWA saves time and resources and gains a wealth of knowledge about the agency.