Posts

Why CRM for dynaMACS Customers?

Manufacturers’ representatives use CRM to stay competitive and to have one central place for everyone to stay on the same page. They use CRM to keep manufacturers informed about what they are working on and the value that they provide as a partner. Manufacturers hire the best rep first and the best reps firms use CRM to manage their customer information.

You can:

  • Create or update sales call notes
  • Opportunities
  • Review Sales numbers
  • Look up Quotes
  • Keep your customer contact information up to date

If you’re going to have a CRM, have one that’s designed for a rep firm. Empowering Systems AccountManager is just that, a sales solution designed for you and how you work, from your phone, from your inbox, offline or online.
Email April to learn more

or get a link to a demo.

Offering solutions that you requested


AccountManager 365 Add-In(CRM from your inbox):

  1. Sell from Microsoft Outlook. Update your opportunities, contacts, accounts and more right in your Outlook in-box on your PC, Mac or phone.
  2. Contacts in one place. Update your contacts in Outlook from the AccountManager Add-in and the other applications will update.
  3. Unclutter your Outlook folders. Email Attachments sync over to AccountManager. One place to find the information you are looking for.
  4. Use the Planner to help organize your team’s workflow. Use the planner to help your team work smarter not harder.


Missed the other blogs regarding our extended capabilities:

AccountManager (CRM)

SalesAnalysis (Sales, Commission and Order Management)

Contact us today to learn more!


Tip #1711 – Import your Sales Goals Quickly with the dynaMACS Optional Module – eSi

Save hours of manual entry by exporting your sales data out of Sales IQ, manipulate the annual number and simply import your sales goals for the next year back into dynaMACS.

Export your sales numbers out of Sales IQ

  1. From the Sales IQ screen enter in a sales rep that you would like to create goals for.
  2. Select the GlobalView Tab.
  3. Select ALL from the Selector drop-down list.
  4. Wait for dynaMACS to process your request.
  5. Select the Export button.
  6. Name the file and place it in a directory that you will remember where it is located.
  7. Exit out of Sales IQ.
  8. Find the file that you just saved. Double click on it and the file will open in Excel.
  9. Insert a column next to the Sales Jan-Dec 17 column (F) and name it Goals.
  10. Create the formula with the percent that you would like to change. (Example shows 15%).
  11. Copy the formula down the spreadsheet and save it as a csv file.
  12. Go into the eSi reformat screen for dynaMACS.
  13. Map the Goals.
  14. Process through the rest of the eSi steps.
  15. NOTE: Make sure that you are posting the session to January of the year that you want the goals to go into. (Example:  01/2018)

Tip #1706 – Are you constantly changing the “display by” search in the customer viewer?

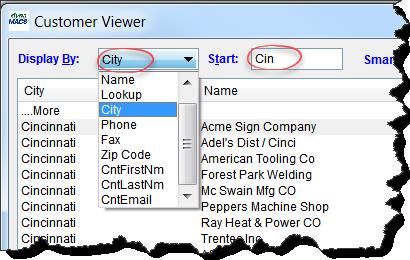
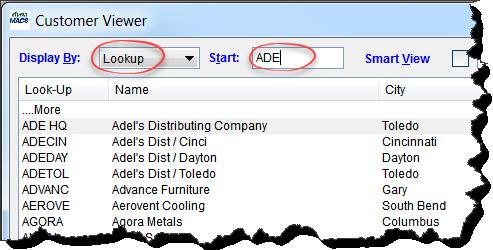
The Display By field in the dynaMACS Viewer screens defaults to “Lookup” which lets you enter the first few characters of the Name i.e. manufacturer, customer or sales rep name in the Start field which will display a list based on that entry.

You can change this default temporarily by selecting the down arrow in the Display By field while in the Viewer screen.  This will change the Display By for the current viewing session.

You can also change the default so that every time you access the Viewer screens it will default to your personal selection.

To Change the Default Display By Field for the Viewer Screens

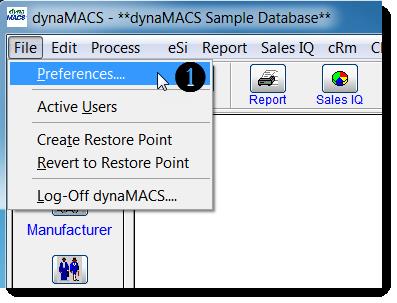
  1.  From the main dynaMACS screen select File>Preferences.

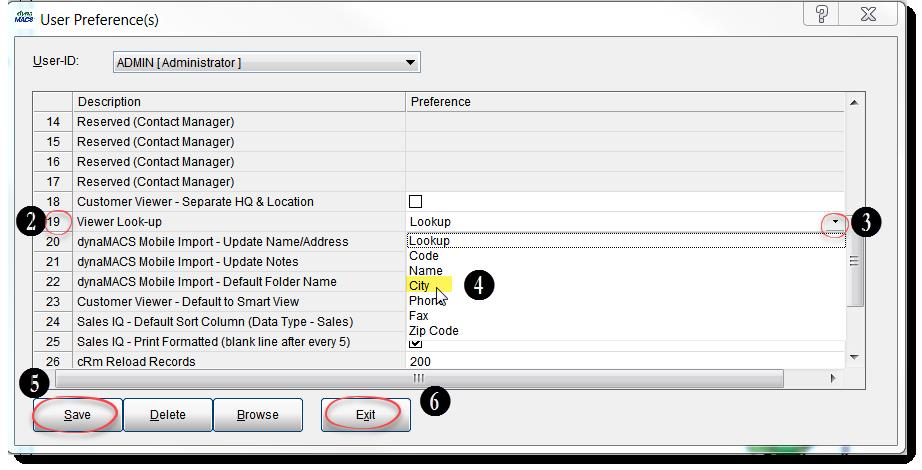
  2. From the User Preference(s) screen, scroll down to #19 Viewer Look-Up.
  3. Select the drop down arrow to the far right of Viewer Look-Up.
  4.  Select the field which you would like your default Viewer Look-Up to be ( i.e. City).
  5. Select the Save button.
  6. Select the Exit button.

Now when you access any of the viewer screens the Display By field will default to that selection.

Tip #1704 – Quickly Identify New and Inactive Manufacturers in dynaMACS Sales IQ

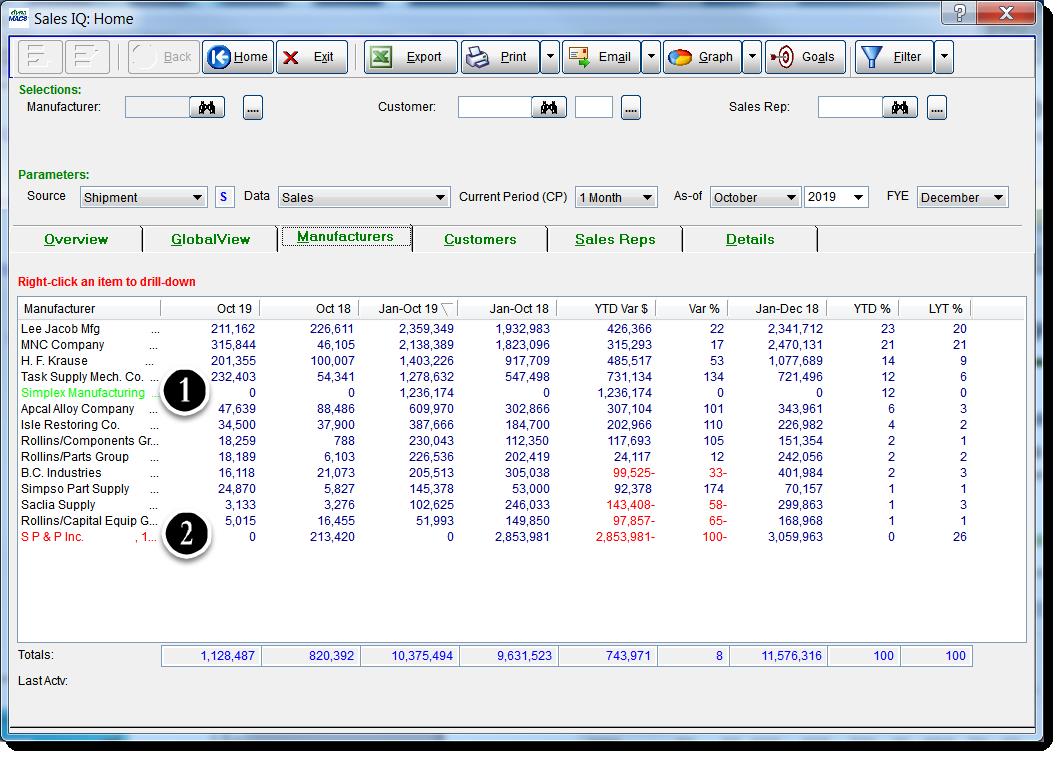
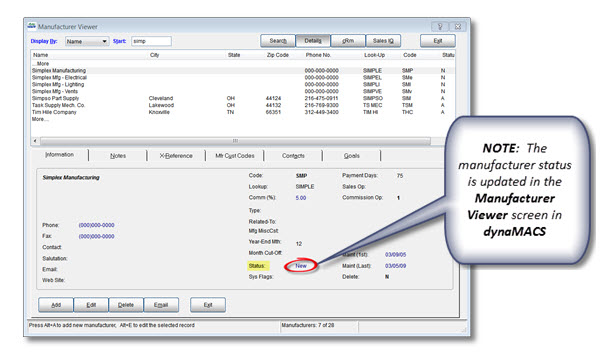
The Sales IQ screen has been enhanced in dynaMACS Version 2016 to quickly identify new manufacturers and inactive manufacturers with a color scheme.  This is based on the Manufacturer Status in the manufacturer record.

  1.  A NEW manufacturer name will now be displayed in the color GREEN.
  2.  An INACTIVE manufacturer name will now be displayed in the color RED.

    Manufacturer Viewer Screen

Tip #1703 – Transferring a Portion of One Sales Rep Territory to Another Sales Rep

dynaMACS makes it easy when you are changing your agency territories.  Instead of moving one customer at a time, dynaMACS can move multiple customers at one time.

In the following example we will transfer all of sales rep Jim Black’s accounts in the state of Kentucky to the new sales rep Rick White.

Customer Global Update

First you must run the Customer Global Update.

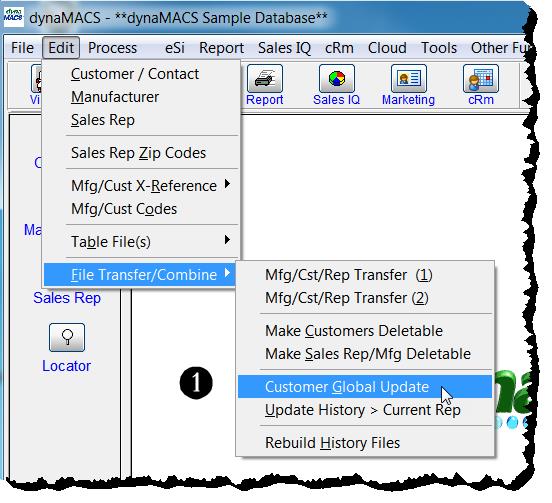
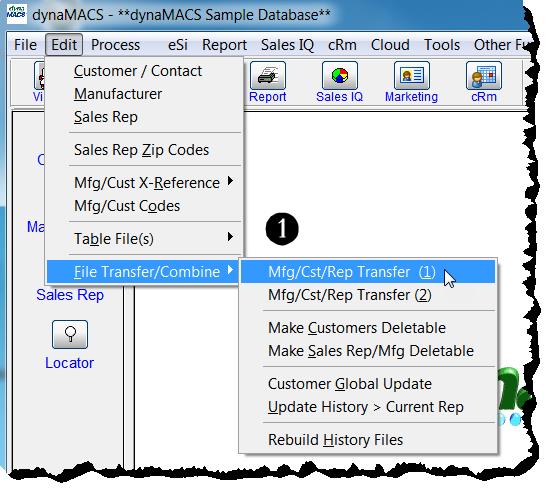
  1.  From the main dynaMACS screen select Edit>File Transfer/Combine>Customer Global Update.
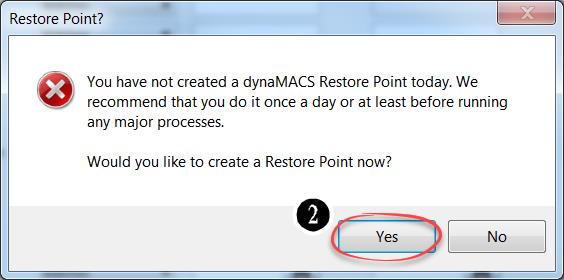
  2. Select the Yes button from the Restore Point? dialog box to create a restore point.
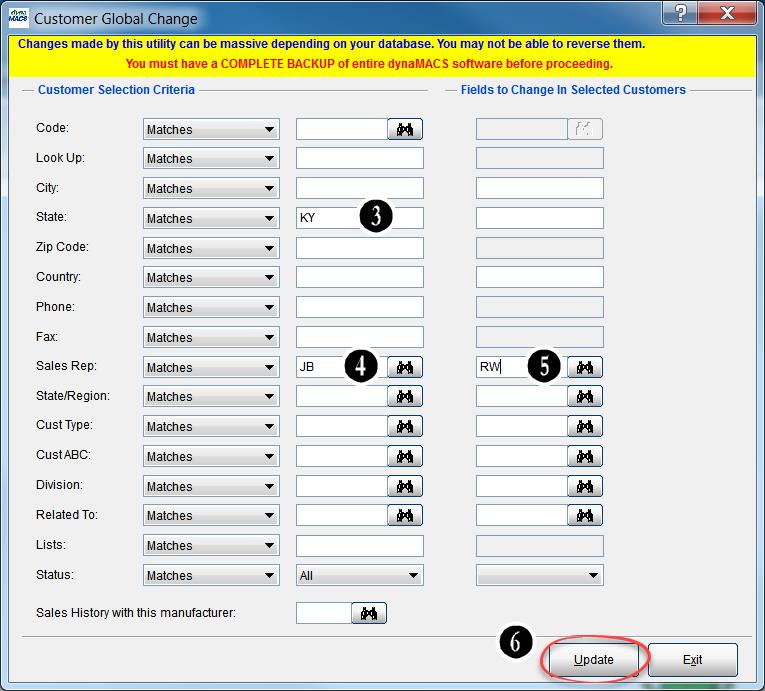
  3. In the Customer Global Change screen enter the state code “KY” in the State field.
  4. Enter the “from” sales rep code “JB in the Sales Rep field (old rep).
  5. Enter the “to” sales rep code “RW” in the next Sales Rep field to the right (new rep).
  6. Select the Update button.
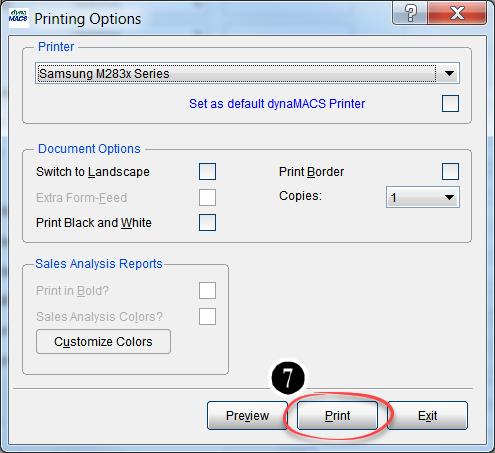
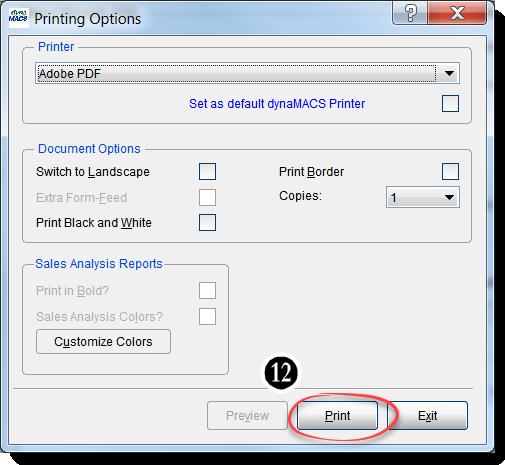
  7. Select the Print button from the Printing Options dialog box to print the Audit Trail report.
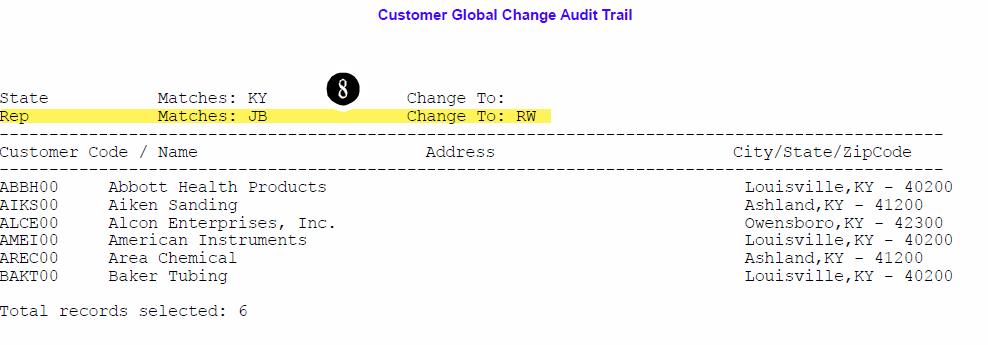
  8. This report shows a list of the customers that will be transferred from sales rep “JB” (Jim Black) to sales rep “RW” (Rick White).
  9. After reviewing the Audit Report select the Yes button to continue.

    Transfer Sales and Commission History to New Rep

    1.  From the main dynaMACS screen select Edit>File Transfer/Combine>Mfg/Cst/Rep Transfer (1).

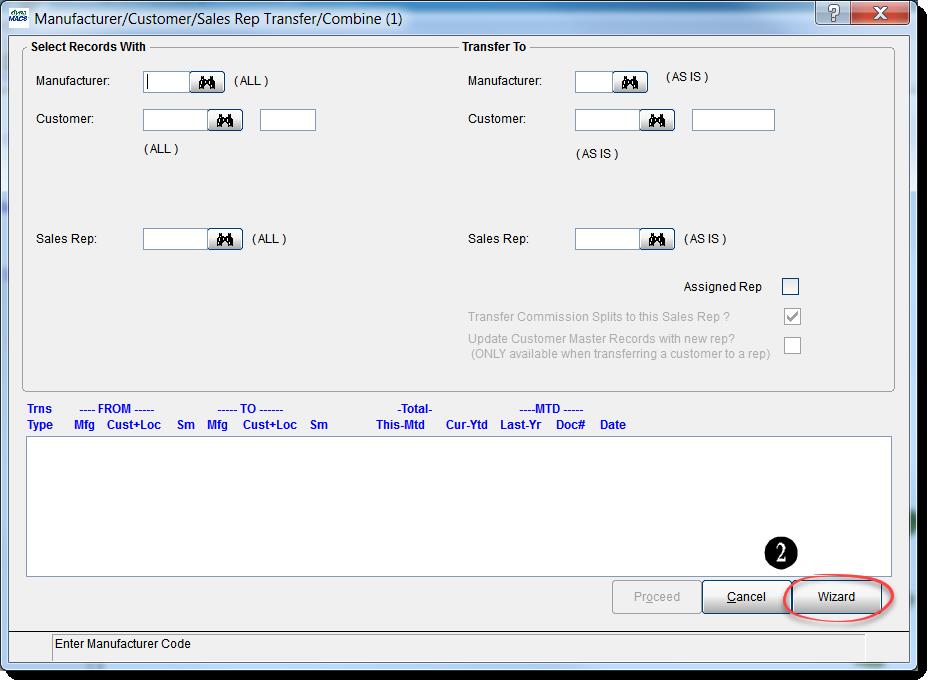
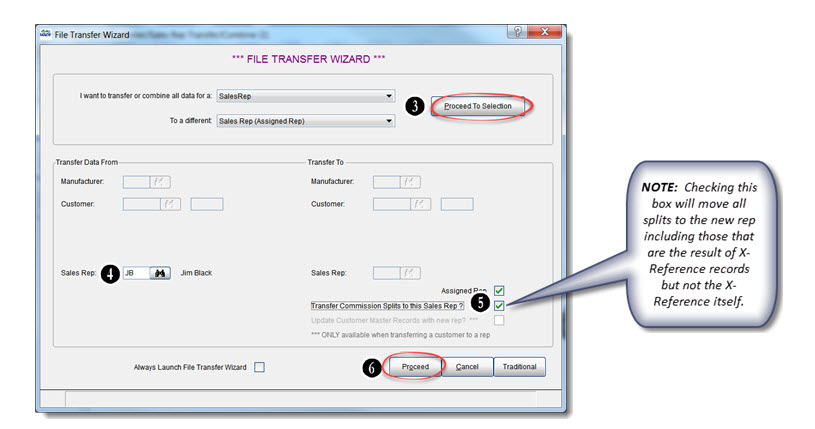
    2.  From the Manufacturer/Customer/Sales Rep Transfer/Combine (1) screen select the Wizard button at the bottom right hand corner which will redirect you to the Wizard screen.  You will be prompted to create another Restore Point.

    3.  Select Sales Rep from the drop down list for the field: I want to transfer or combine all data for a:.  Select Sales Rep and for the field: To a different.  Then select the Proceed to Selection button.
    4.  Enter the Sales Rep code that you are transferring from under Transfer Data From i.e. “JB”.
    5.  If you wish to transfer the sales rep splits, check the box Transfer Commission Splits to this Sales Rep?
    6.  Select the Proceed button.
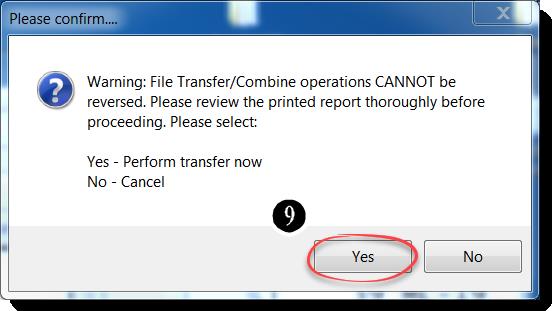
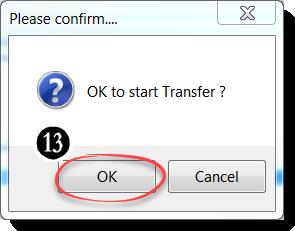
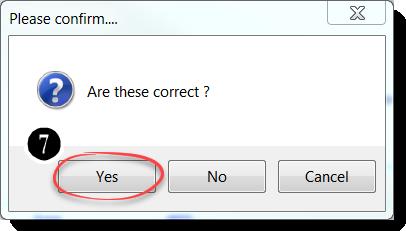
    7.  Select the Yes button on the Please Confirm dialog box.
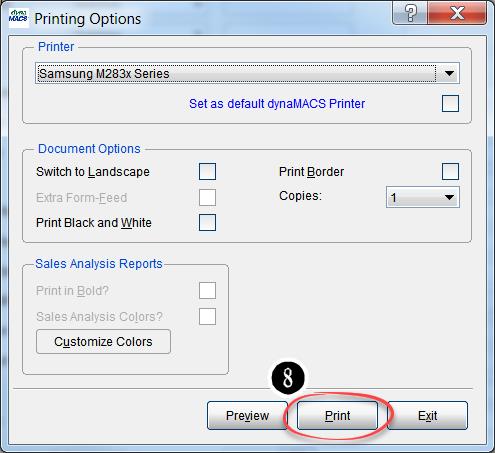
    8.  From the Printing Options screen select your printer and then select the Print button.

    9.  Review the report and then select the Yes button to complete the transfer.

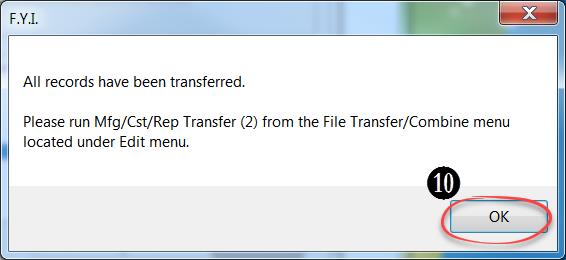
    10.  Select the OK button after all records have been transferred.

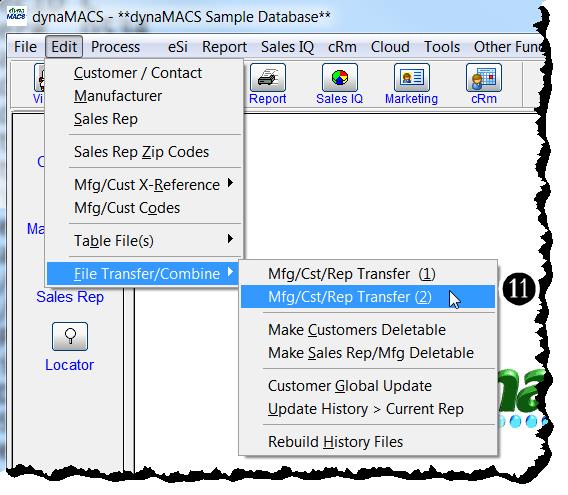
    11.  From the main dynaMACS screen select Edit>File Transfer/Combine>Mfg/Cst/Rep Transfer (2).

    12.  Print the report when prompted by selecting the Print button.
    13.  Select the OK button on the Please Confirm dialog box to complete the transfer.