Posts

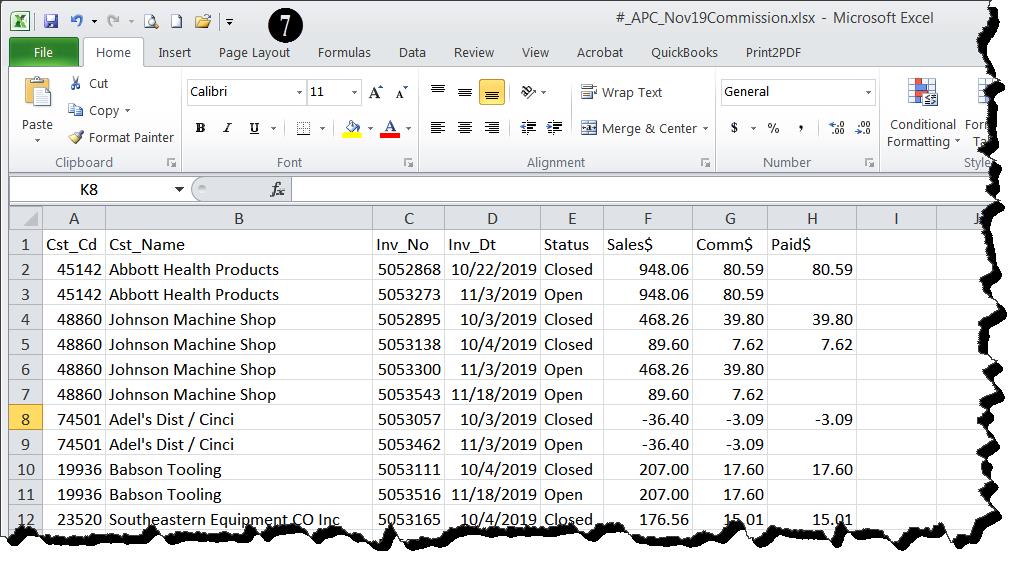
Tip #1609 – A customer may be known by different names by different manufacturers. This can create unwanted customer duplication during the sales entry process.

In business it is common that companies merge, create DBA’s or an alias.  dynaMACS has a unique feature that allows you to refer to the correct customer.  The instructions below will walk you through how to accomplish this.

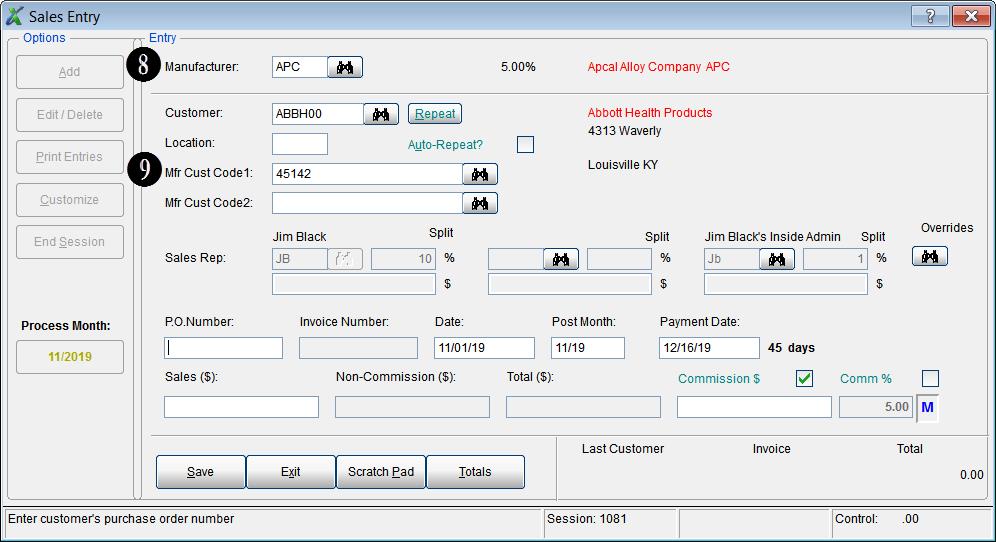
Add the New Customer

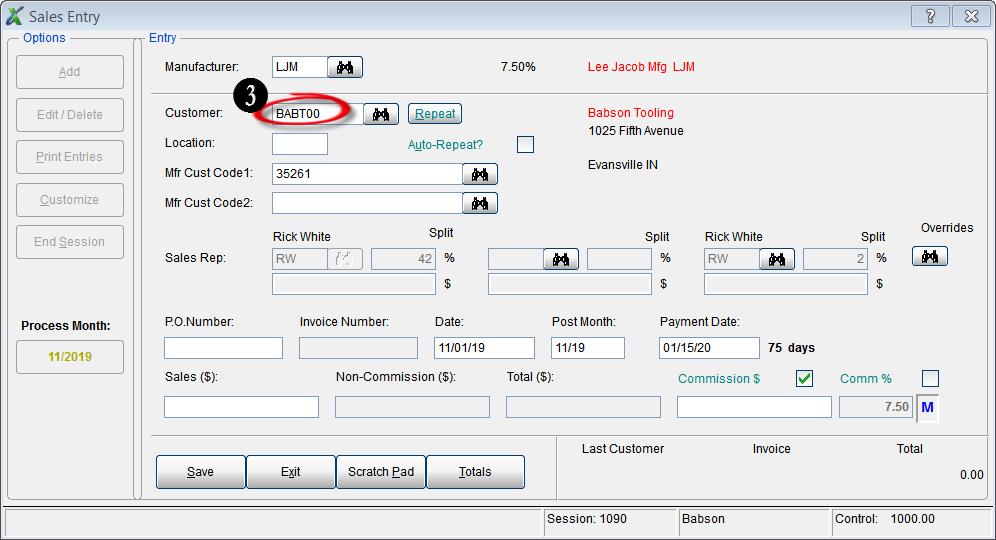
Add the new customer (DBA or Alias) which will be related in dynaMACS. In this example we added customer Babson Tooling (customer code BABT00).note

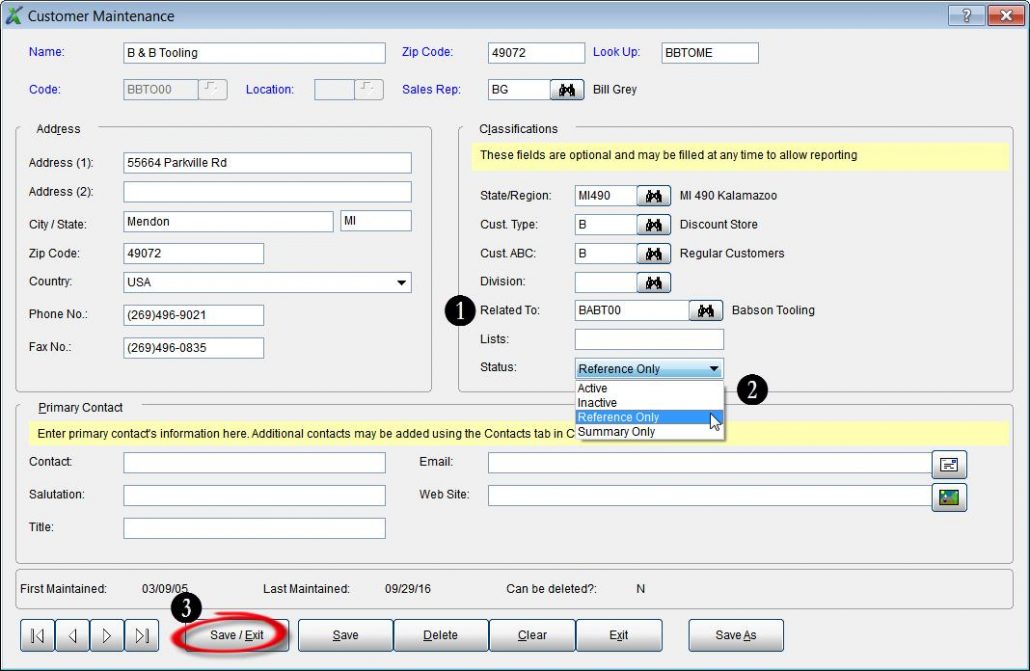
  1.  Edit the original customer in dynaMACS to reflect the new customer as a reference   customer in the Related To field.  In this example the customer B & B Tooling (BBTO00) is the original customer. Babson Tooling (customer code BABT00) is the Related To customer.
  2. Change the Status for B & B Tooling to Reference Only.
  3. Select the Save/Exit button.sales-entry-screen-1

Making Sales Entries Using Related to Customers

  1. In Sales Entry, enter the old customer code for B & B Tooling (BBTO00).
  2. You will get a message as seen below displaying the Reference Customer code.  Select the OK button.sales-entry-screen-2
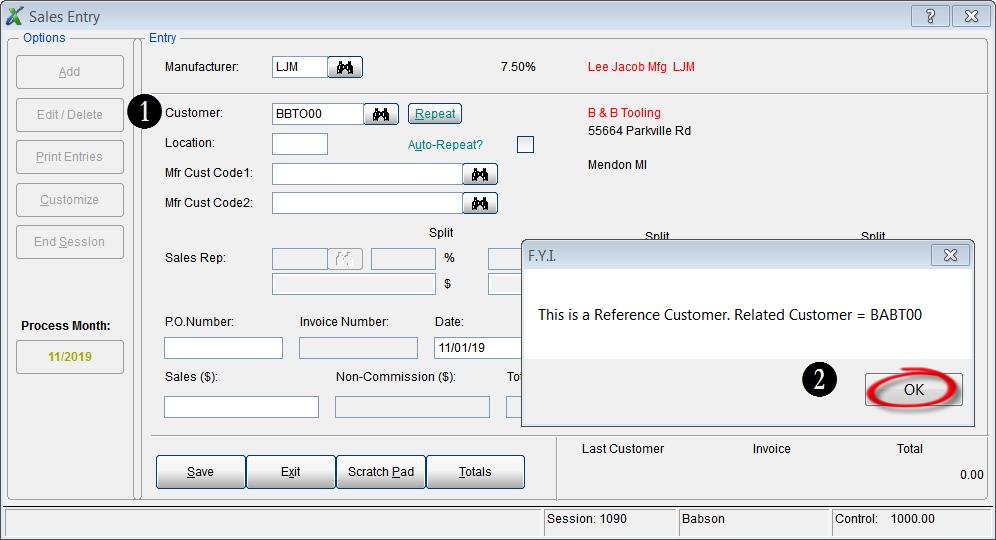
  3. After selecting the OK button you will see that the Customer Code changes to the newly created Reference Customer code for Babson Tooling (BABT00).

sales-entry-screen-3

Tip #1608 – Save Time by Using the Manufacturer Customer Code During Manual Entry

When entering Sales and Commissions directly from a manufacturer’s spreadsheet or invoice, it may be quicker to enter in Sales Entry using the Manufacturer Customer Code.  The following tip explains how to customize a sales entry session to accomplish this.

  1.  From the Sales Entry screen select the Customize button.Sales Entry Screen 1
  2. Select the Manufacturer radio button and enter the Manufacturer Code.  In this example we will use the manufacturer code APC for Apcal Alloy Company.  You can click on the Binoculars button to search for the Manufacturer Code if you don’t have it.
  3. Select By Mfr Cust Code from the drop down in the Customer field.
  4. Click on the Save button and then select the Exit button.Sales Entry Options Screen
  5. You will be returned to the Sales Entry screen.
  6. Select the Add button to begin adding your sales and commission information.Sales Entry Screen 2
  7. Below is a sample of a manufacturer spreadsheet from the manufacturer Apcal Alloy      Company which shows the manufacturer customer codes along with the sales and       commission information.Manufacturer Spreadsheet
  8. Enter the Manufacturer code in the Sales Entry screen and select <Enter>.  (In this example it’s APC for Apcal Alloy Company)
  9. You will notice that the cursor then jumps directly to the Mfg Cust Code 1 field where you     can enter the manufacturer customer code from the spreadsheet or invoice.  You can also click on the Binoculars button to search for the Manufacturer Customer Code if you don’t have it.  From here you can continue on with your sales entry as normal.Sales Entry Screen 3