Posts

Tip #1606 – How to automatically give a sales rep, that is not currently assigned to a particular customer, credit for a sales based upon the manufacturer

dynaMACS makes it easy to automatically assign a sales rep to each entry. By default, this assignment is based on the sales rep associated with the customer.  During entry, the operator can override this sales rep, if desired.  However, there may be situations where a different sales rep always gets credit for a particular manufacturer.  This tip will show how to set-up dynaMACS to accomplish such an override.

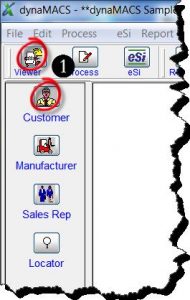
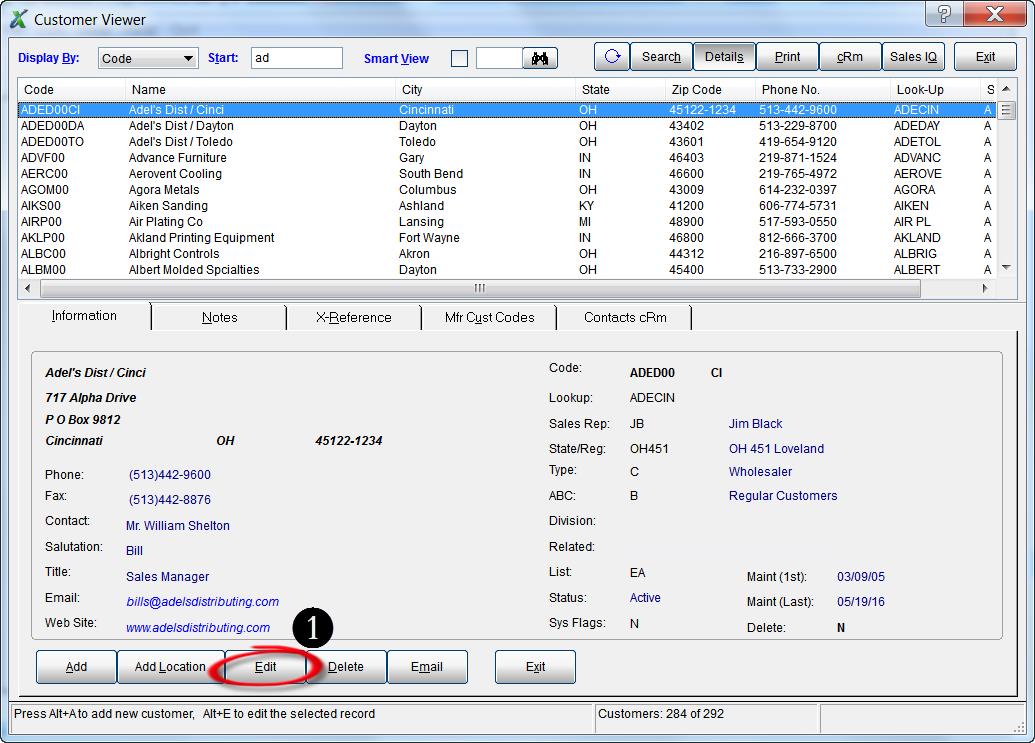
  1.  From the main dynaMACS screen select the Viewer icon and then the Customer icon to get to the Customer Maintenance screen.
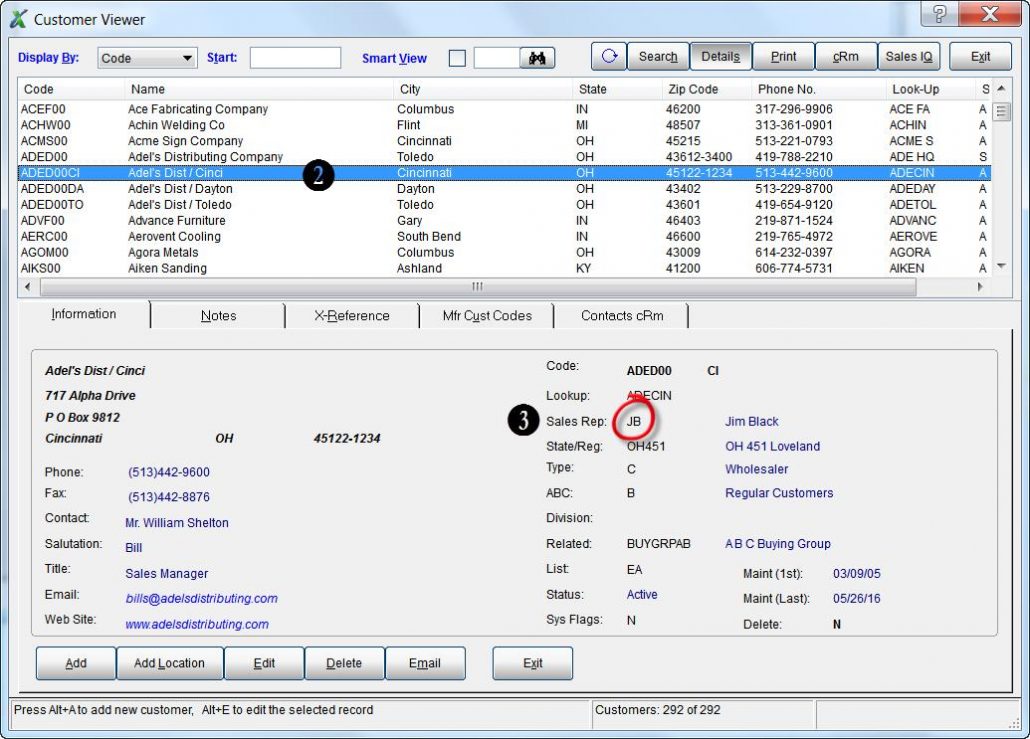
  2. From the Customer Viewer screen highlight the customer.  In this example we are selecting Adel’sDist/Cinci.
  3. Notice that the Sales Rep for this customer is JB Jim Black. Customer Viewer
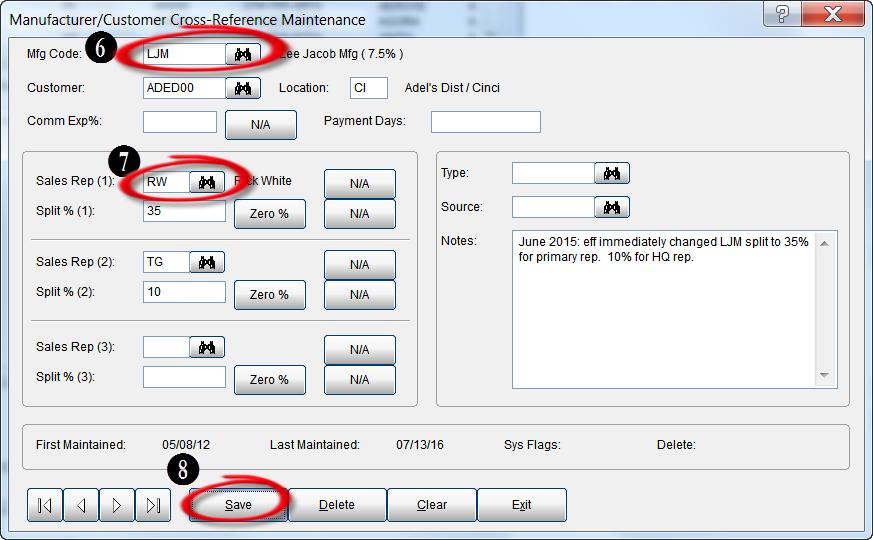
  4. Select the X-Reference tab.
  5. Select the Add button.
    Customer Viewer 2
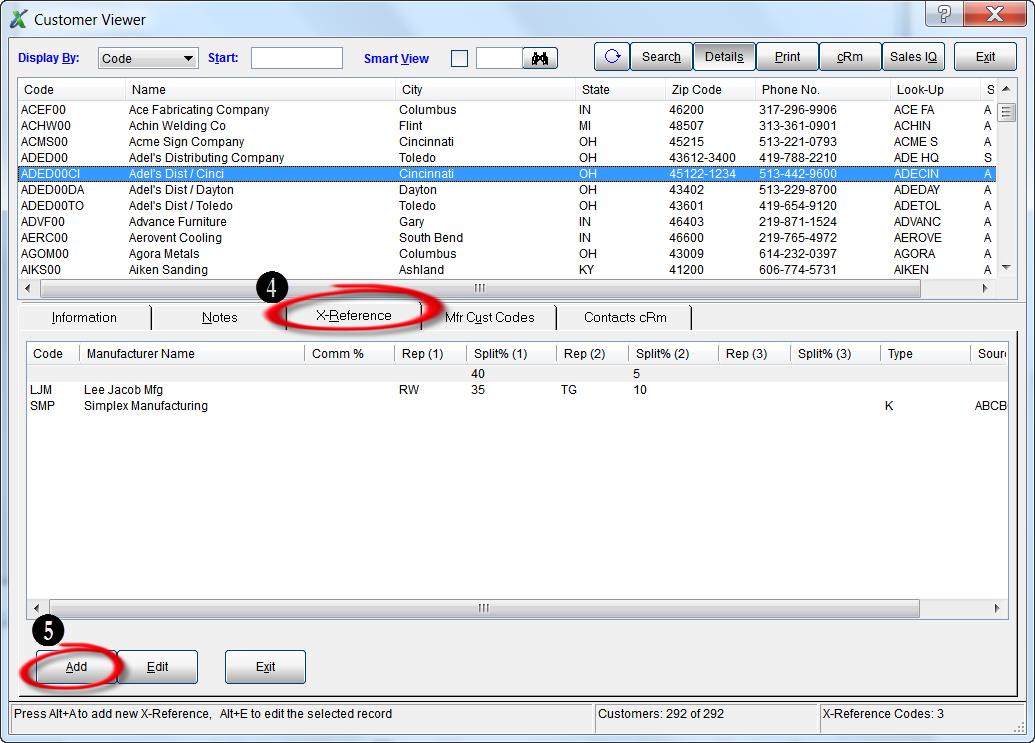
  6. Enter or search for the Mfg Code.  In this example we will select “LJM” Lee Jacob Mfg.
  7. Enter or search for the Sales Rep (1) code.  We will use the Sales Rep code of “RW” for Rick White in this example.
  8. Select the Save button.
    Mfg-Cust Cross Ref screen
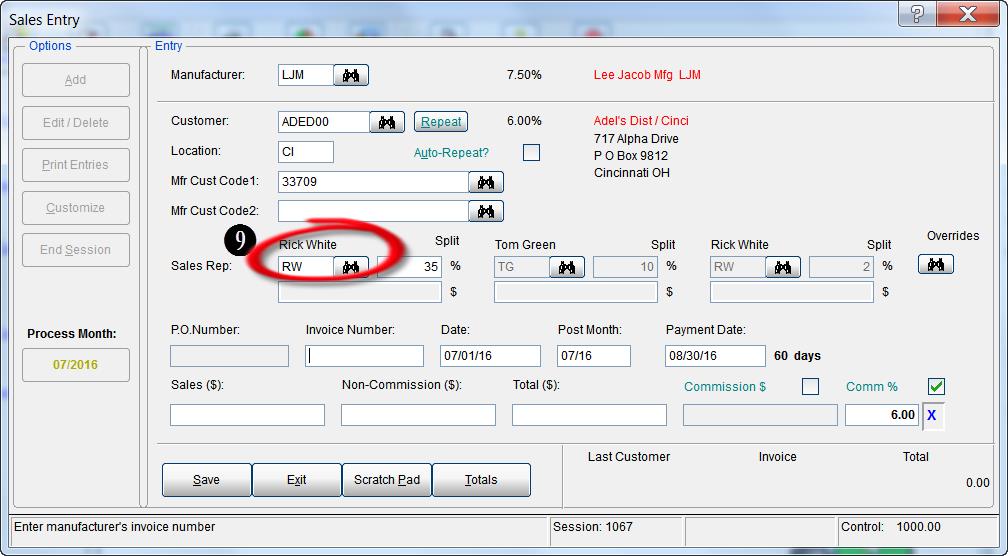
  9. As you can see below in the Sales Entry screen the Sales Rep field now reflects the change to the new sales rep for this manufacturer/customer.
    Sales Entry

Tip #1605 – Analyze Sales & Commission data for Multiple Customers in a specific Buying Group

By relating customers to a “buying group” customer, you can analyze the combined sales and commission totals for all the related customers. In addition, you can summarize the buying group into one total while looking at all your customers by selecting the summarize box next to the customer Related field for the filter.

Relating Customers

  1.  From the Customer Viewer screen highlight the customer to be related and select the Edit button.Customer Viewer
  2. In the Related-To field enter the Customer Code to relate this customer to or search for the customer code by using the Binoculars button.
  3. Select the Save/Exit button.

Customer Maint Screen

Filter Sales IQ to See Related Customer Activity

  1.  From the Sales IQ screen select the Filter button.Sales IQ Home Screen
  2. In the Filters screen enter the Related customer code in the Starts With and Ends With fields. In this example we are using ABC Buying Co (customer code BUYGRPAB).  You can search for the customer code by using the Binoculars button.
  3. Select the Apply button.Filters Screen
  4. The Sales IQ Home screen will appear.  Select the Customer tab.  The detailed activity for those customers related to ABC Buying Group will be displayed.Sales IQ Home Screen 2
  5. If you would prefer to see summarized information, go back to the Filters and select the Clear button and then the Summarize button to the far right of the Customer Related field.
  6. Select the Apply button.Filters Screen 2
  7. The Sales IQ Home screen will appear with the summarized activity for all customers.  You will notice the ABC Buying Group summarized on the first line highlighted below.Sales IQ Home Screen 3

Case Study: RWA

“Data entry time takes a fraction of what it used to. Manually entering thousands of lines of data took a week. With dynaMACS we’re done in 15 minutes.”

Mary Elizabeth Faulkner
RWA

RWA_LogoClient Challenge

RWA sales agency was using sales and commission software that had some basic functionality, but wasn’t delivering the level of information the agency needed to analyze performance and uncover ways to grow the business.

The agency was introduced to dynaMACS at a trade show when the President and CEO of RWA, Ron Wallace, as speaking to a colleague from another agency. Talk turned to sales and commission software and the other agency highly recommended the software they used, which was dynaMACS.

RWA_StatisticsdynaMACS Solution

RWA did some research and found dynaMACS to be a powerful sales and commission tool with the ability to analyze sales, pay reps, track commissions and access in-depth reporting.

Mary Elizabeth Faulkner supports the salespeople from the main office and says, “Reps get information that can be shown by manufacturer, distributor and much more. They always know what’s happening in their territory.”

Comprehensive reporting is essential for any agency. “dynaMACS shows meaningful, easy-to-understand reports that provide us vital information,” she says. The agency can sort and filter for more in-depth data and analyze the business in numerous ways.

RWA also reconciles manufacturer commission statements and runs reports to pay the sales reps. With dynaMACS eSi, the agency imports manufacturers’ sales invoices and reports electronically, with minimal manual processes. “Data entry time takes a fraction of what it used to. Entering thousands of lines of data manually took a week. With dynaMACS we’re done in 15 minutes.”

RWA saves time and resources and gains a wealth of knowledge about the agency.

Tip #1604 – Did you Know that the Customer State and City can be Printed on Your Sales IQ Reports?

When selecting the Print button from the Sales IQ Customer screen, the report does not display the customer’s state and city as you can see in the example below.  This tip will give you instructions to change your printing options enabling you to print that information on the Sales IQ Customer report.

Example

Sample Report 1


Printing the Customer State and City on the Sales IQ Report

  1.  After making selections defining your Sales IQ customer query, click on the Down Arrow button to the right of the Print button.Sales IQ Screen 1
  2. Choose Select from the drop down box.Sales IQ Screen 2
  3. You will see that the Print button has now changed to a Select button.  Choose the  Select button.Sales IQ Screen 3
  4. A Printing Options box will open.   From here you to change your default printer and edit other printing options.
  5. Select one of the checkboxes under Print State/City? You can choose print Beside Customer Name which will print the city and state to the right of the customer name.  Or, you can choose On the Next Line which will print the state and city on the line below the customer name.  (See the examples below to view the layout of each of these options.)
  6. Select the Print button.

Printing Options

Example of Printing State and City Beside the Customer Name:

Sample Report 2

Example of Printing State and City on the Next Line:

Sample Report 3

Tip #1603 – How to Delete a dynaMACS Mobile User

You must first delete the mobile user from the dynaMACS Mobile Configuration screen and then delete it from the User Class Maintenance screen.  Below are the steps required to delete a dynaMACS Mobile user.

Delete a Mobile User from dynaMACS Mobile Configuration

The first step is to delete the mobile user from the dynaMACS Mobile Configuration screen.

  1.  From the main dynaMACS screen select Other Functions>Administration>dynaMACS Mobile Configuration.DM Main Screen
  2. From the dynaMACS Mobile Configuration screen, enter the serial # of the user that you wish to delete.
  3. If you don’t know the serial number, you can use the Arrow buttons at the bottom left of the screen to look through all of your mobile users until you find the correct one.Mobile Config Screen
  4. With the mobile user displayed in the dynaMACS Mobile Configuration screen, select the Delete button at the bottom of the screen.Mobile Config Screen 2
  5. Confirm that you wish to delete this user by selecting the Yes button in the confirmation dialog box.Confirmation Dialog Box

Note_dynaCARE

The mobile user has now been deleted from the dynaMACS Mobile Configuration screen.

Delete a Mobile User from dynaMACS User Class Maintenance

The last step is to delete the mobile user from the dynaMACS User Class Maintenance screen.

    1.  From the main dynaMACS screen select Other Functions>Security>User/Class Maintenance.

      DM Main Screen 2
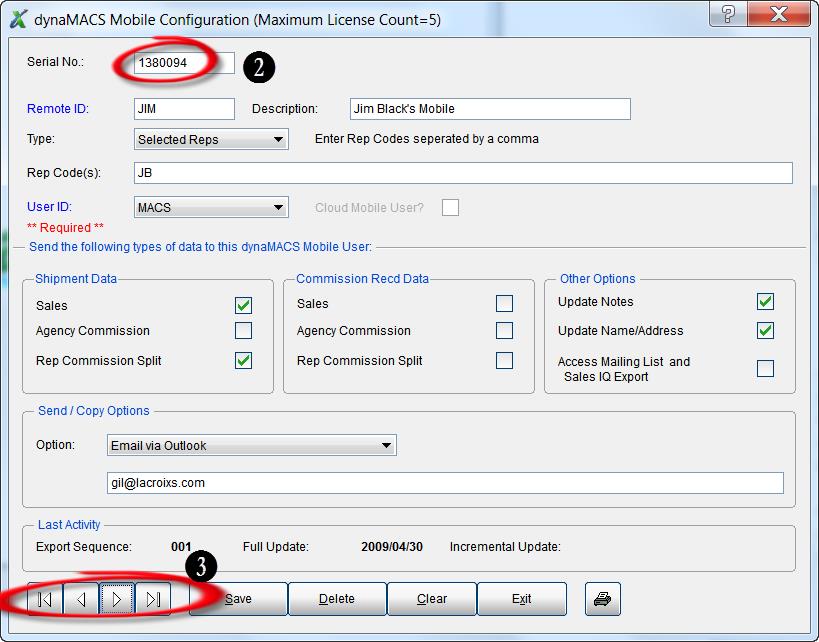
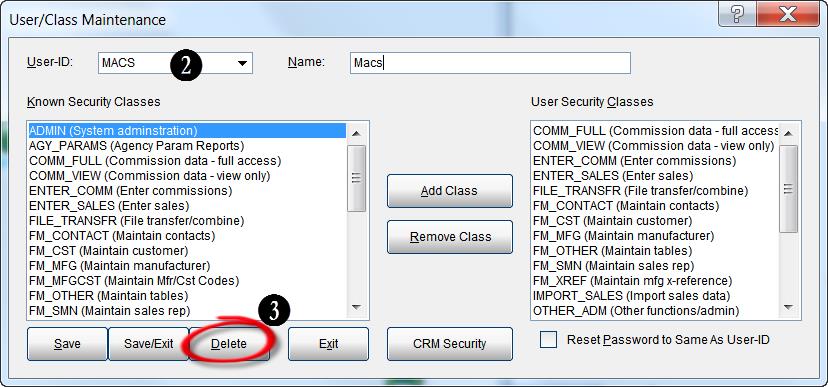
      2.  Enter the Mobile User ID or select it from the drop down list in the User-ID field.
      3.  With the correct Mobile User ID selected, click the Delete button.User Class Maint Screen

Tip #1602 – Did You Know That You Can “Catalog” (Save) Your Commonly Used Reports

The Sales Analysis report feature in dynaMACS provides the ability to save a sales analysis report by “cataloging” it.  This eliminates the need to re-enter the report criteria each time you need to run the report by selecting it from the Catalog drop down menu in the Sales Analysis Reports screen.  The following are examples of creating, retrieving and deleting catalogs.

Creating a Catalog:

  1. After selecting your report criteria in the Sales Analysis Reports screen, select the Save button at the top of the screen.
  2. In the Catalog Report As box, enter a name for your report in the Name field and select the OK button.
    Sales Analysis Reports Screen

Retrieving a Catalog:

  1. To access your saved catalogs from the Sales Analysis Reports screen, select the Down Arrow next to the Catalog field and then select the catalog for the report you want to print.Sales Analysis Reports Screen (2)

Deleting a Catalog:

  1.  From the Sales Analysis Reports screen, select the Down Arrow next to the Catalog field and then select the catalog that you wish to delete.Sales Analysis Reports Screen (3)
  2. Once the catalog is displayed; select the Delete button at the top of the Sales       Analysis Reports screen to delete the catalog.
    Sales Analysis Reports Screen (4)