Posts

Offering solutions that you requested


AccountManager 365 Add-In(CRM from your inbox):

  1. Sell from Microsoft Outlook. Update your opportunities, contacts, accounts and more right in your Outlook in-box on your PC, Mac or phone.
  2. Contacts in one place. Update your contacts in Outlook from the AccountManager Add-in and the other applications will update.
  3. Unclutter your Outlook folders. Email Attachments sync over to AccountManager. One place to find the information you are looking for.
  4. Use the Planner to help organize your team’s workflow. Use the planner to help your team work smarter not harder.


Missed the other blogs regarding our extended capabilities:

AccountManager (CRM)

SalesAnalysis (Sales, Commission and Order Management)

Contact us today to learn more!


             Now offering even more capabilities


AccountManager (CRM):

  1. Sell from Microsoft Outlook. Update your opportunities, contacts, accounts and more right in your Outlook in-box on your PC, Mac or phone.
  2. Sell from your phone. Update your opportunities, contacts and more with voice to text as you walk out of meetings with our new AccountManager App. Then sync your opportunity with your principal’s Salesforce CRM in one click.
  3. Create a custom layout for each Principal. Create custom opportunity layouts so that you hit the target and maximize user productivity with just the fields that are required.
  4. Manage Quotations. No more hunting for quotations, simply link them to your opportunity, so they’re where they need to be. You won the business, turn the quote directly into an order.

Keep an eye out for more in our upcoming blog:

AccountManager Office 365 (CRM from your In-box)

SalesAnalysis (Sales, Commission and Order Management)

If you can’t wait contact us today!

Case Study: State Side Sales

 “dynaMACS uses GoogleMaps to plan efficient routes when we visit multiple customers. We spend less time in the car and more time selling.”

Joe Durbin, President
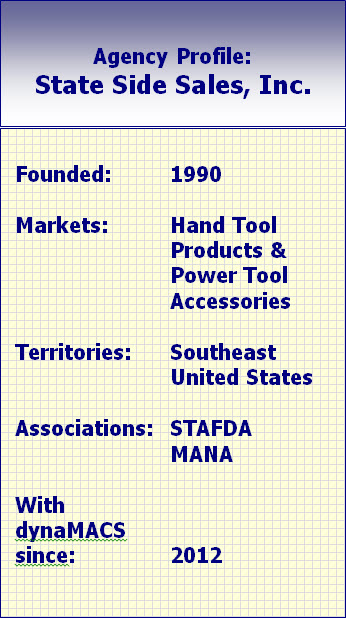
State Side Sales, Inc.

Client Challenge

State Side Sales Agency was using rudimentary sales and commission software that didn’t provide enough useful information to meet their needs. The agency chose dynaMACS and instantly had a wealth of meaningful data to analyze performance, track trends and operate proactively. As the years passed, the agency became accustomed to having all the sales and commission information they needed at their fingertips. When State Side Sales stopped using dynaMACS and tried to get by with different software, they missed many of dynaMACS’ features.


dynaMACS Solution

Joe Durbin, President of State Side Sales, read an article on LinkedIn about dynaMACS’ ability to map routes when visiting multiple customers, and he saw an opportunity to improve his agency’s efficiency. “We were already missing our favorite dynaMACS features. When I saw the GoogleMaps function, I knew it was time to go back to dynaMACS. We now spend less time in the car and more time selling and building relationships.”

While looking at the sales numbers, reps select the customer addresses that they want to visit. A map view of all locations is displayed, along with the most efficient routes and directions between locations. Sales reps can also re-sequence the route if they choose. “We’re increasing efficiency, reducing travel time and maximizing reps’ time.”

The agency also has the ability to select a territory and see performance data for the top 20% of manufacturer/customer relationships (using sales volume). “We use this as a performance indicator and we see trends faster. It’s another level of knowledge that we didn’t have without dynaMACS.”

dynaMACS continually adds new functionality, and the support team is on hand to show State Side Sales tips and tricks for extracting detailed information organized in meaningful ways, with just a few mouse clicks.

Tip #1705 – dynaMACS Helps Agencies get Sales & Commission Information Electronically with this Manufacturer Benefits White Paper

Electronic Sales Information (eSi) is the electronic distribution of sales information from manufacturer to sales agencies. The dynaMACS eSi module can replace hours of data entry with a quick and easy process of automatically importing sales information from manufacturers that email their sales information in a spreadsheet format.

The move to dynaMACS eSi requires a simple change in an administrative process on the part of the manufacturer.  Instead of paper reports, the manufacturer produces a spreadsheet that contains the same information and sends it via email to sales agencies. The manufacturer buys no special software, no additional hardware and actually saves money by reducing paper, postage and administrative support costs. The agency receives the information on the same day the manufacturer sends it. The agency can then process the information immediately and if desired, distribute it to sales reps in the field.

The eSi process:

  1.  The agency receives data from the manufacturer via email, CD, or Internet download. No more waiting days or months for data.
  2. Data is provided in a standard comma-delimited (.csv) format or spreadsheet, for automatic upload to the agency database. Data entry is eliminated and so are operator errors.
  3. The agency processes the file to identify new or first-time customers and to balance total sales and commission amounts. Files are updated using dynaMACS’ easy on-screen error correction and new customer lookup capabilities. Your manufacturer customer codes are automatically matched to dynaMACS codes.

It is literally that easy. Giving you instant access to vital sales analysis and commission information, dynaMACS is a fast, flexible and reliable way of managing sales and commission data.

Click Here to view the white paper


If you do not currently have dynaMACS eSi and would like more information about it, please visit www.dynamacs.com/products/esi.shtml or call us at 800-321-1788.

Tip #1703 – Transferring a Portion of One Sales Rep Territory to Another Sales Rep

dynaMACS makes it easy when you are changing your agency territories.  Instead of moving one customer at a time, dynaMACS can move multiple customers at one time.

In the following example we will transfer all of sales rep Jim Black’s accounts in the state of Kentucky to the new sales rep Rick White.

Customer Global Update

First you must run the Customer Global Update.

  1.  From the main dynaMACS screen select Edit>File Transfer/Combine>Customer Global Update.
  2. Select the Yes button from the Restore Point? dialog box to create a restore point.
  3. In the Customer Global Change screen enter the state code “KY” in the State field.
  4. Enter the “from” sales rep code “JB in the Sales Rep field (old rep).
  5. Enter the “to” sales rep code “RW” in the next Sales Rep field to the right (new rep).
  6. Select the Update button.
  7. Select the Print button from the Printing Options dialog box to print the Audit Trail report.
  8. This report shows a list of the customers that will be transferred from sales rep “JB” (Jim Black) to sales rep “RW” (Rick White).
  9. After reviewing the Audit Report select the Yes button to continue.

    Transfer Sales and Commission History to New Rep

    1.  From the main dynaMACS screen select Edit>File Transfer/Combine>Mfg/Cst/Rep Transfer (1).

    2.  From the Manufacturer/Customer/Sales Rep Transfer/Combine (1) screen select the Wizard button at the bottom right hand corner which will redirect you to the Wizard screen.  You will be prompted to create another Restore Point.

    3.  Select Sales Rep from the drop down list for the field: I want to transfer or combine all data for a:.  Select Sales Rep and for the field: To a different.  Then select the Proceed to Selection button.
    4.  Enter the Sales Rep code that you are transferring from under Transfer Data From i.e. “JB”.
    5.  If you wish to transfer the sales rep splits, check the box Transfer Commission Splits to this Sales Rep?
    6.  Select the Proceed button.
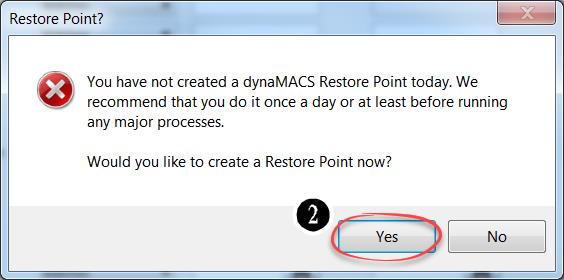
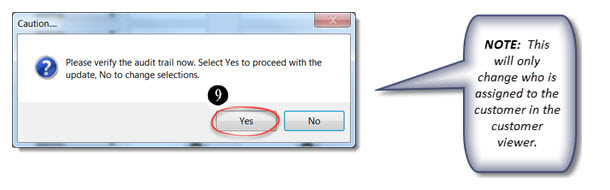
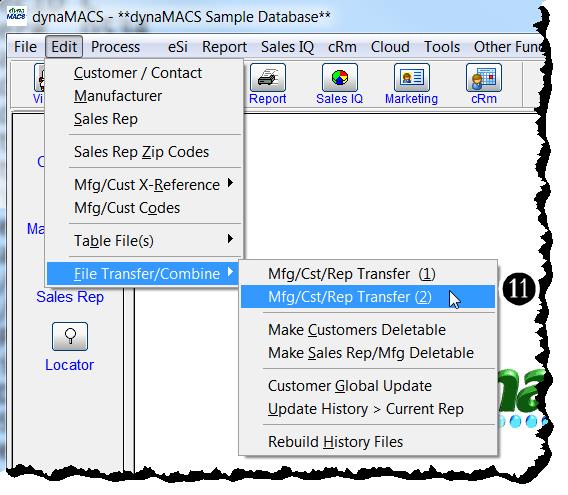
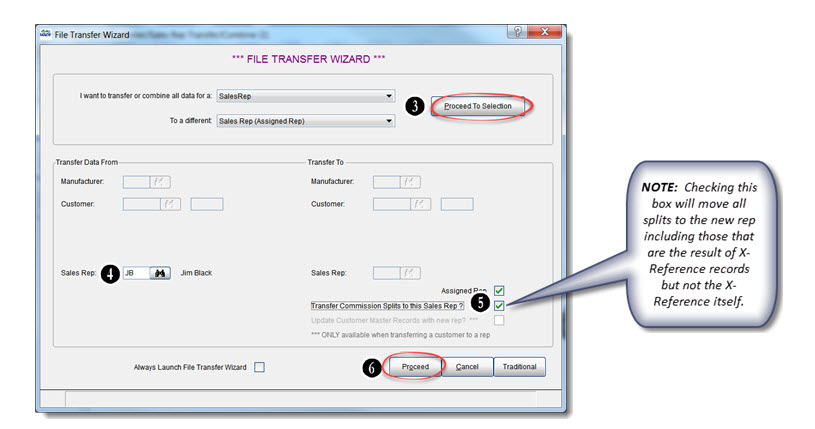
    7.  Select the Yes button on the Please Confirm dialog box.

    8.  From the Printing Options screen select your printer and then select the Print button.

    9.  Review the report and then select the Yes button to complete the transfer.

    10.  Select the OK button after all records have been transferred.

    11.  From the main dynaMACS screen select Edit>File Transfer/Combine>Mfg/Cst/Rep Transfer (2).

    12.  Print the report when prompted by selecting the Print button.
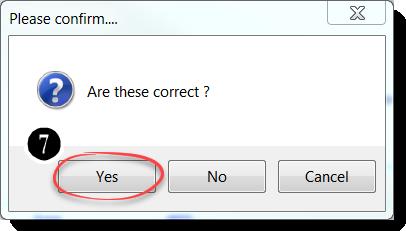
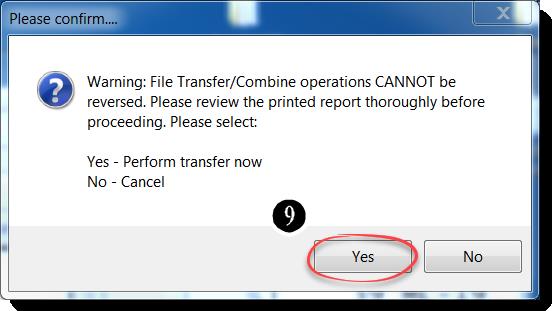
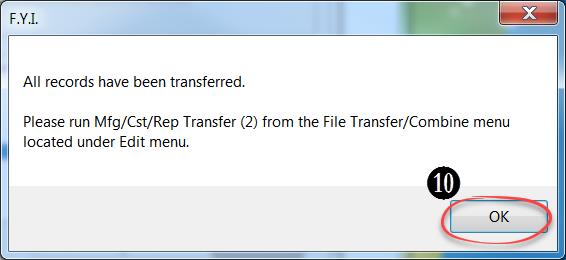
    13.  Select the OK button on the Please Confirm dialog box to complete the transfer.

Tip #1702 – Organizing Your Agency Workflow to Accommodate all the Various Manufacturers

One of the many challenges sales agencies face is dealing with the many forms and documents received from each of the manufacturers that the agency represents. Whether a document gets entered into dynaMACS, QuickBooks or just filed, it is helpful to document the process for each unique manufacturer document received.  We suggest that you create a binder with a tab for each manufacturer and use the form below (or something similar) for each document.

Create a Binder

  1. Set up a binder with a tab for each manufacturer.
  2. Behind each tab you should have the dynaMACS Manufacturer Document Workflow Worksheet (example below) and examples of all other documents you receive from the manufacturer.
    Example:
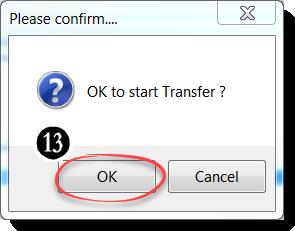
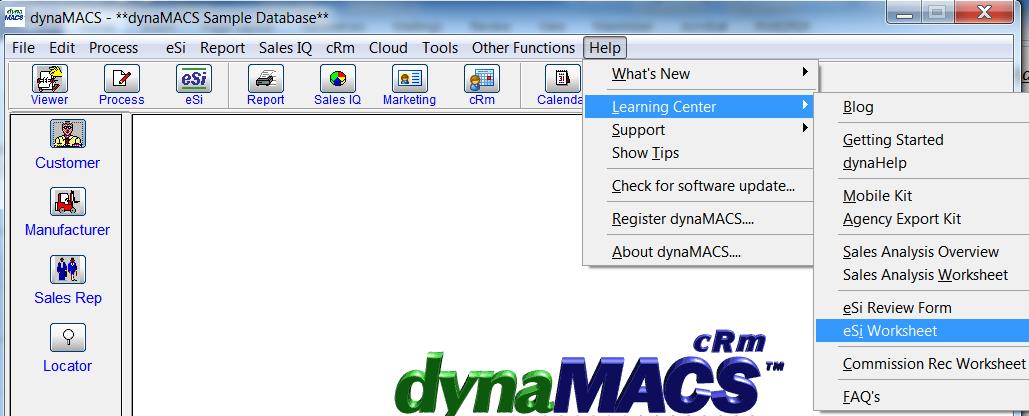
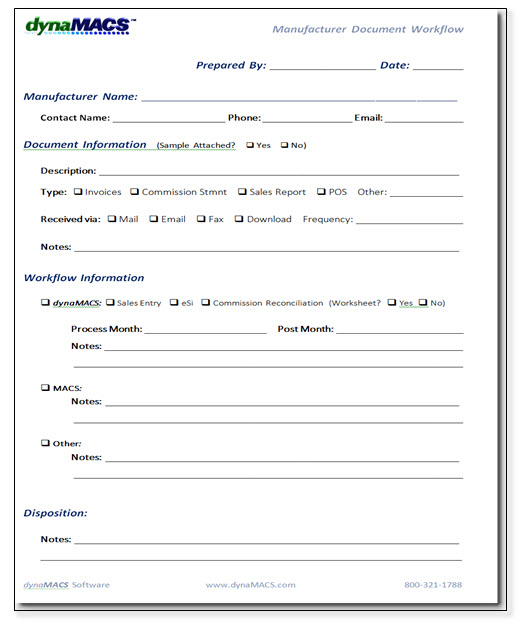
    To obtain copies of this worksheet and all other dynaMACS worksheets go to Help>Learning Center from the dynaMACS Main Screen.  You will also find them in the dynaMACS Implementation Kit that you receive upon purchasing your software.