Tip #1406 – dynaMACS Software Start Options
You can set your preferences in dynaMACS so that either the Sales IQ, Process, eSi or cRm screens open first upon launching dynaMACS. You can also set preferences so that when your Sales IQ screen opens, the Source field defaults to Sales or Commission Received. The following explains how to set these preferences.
Setting the dynaMACS Main Screen Focus
You can select what screen you would like to appear when first launching dynaMACS by selecting it in the Preferences screen. In the following example we will change the start screen from the dynaMACS Home screen to the Sales IQ screen.
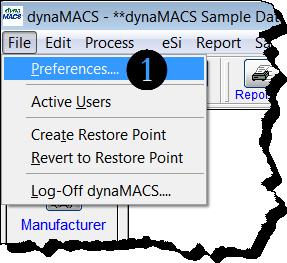
- From the main dynaMACS screen select File>Preferences.
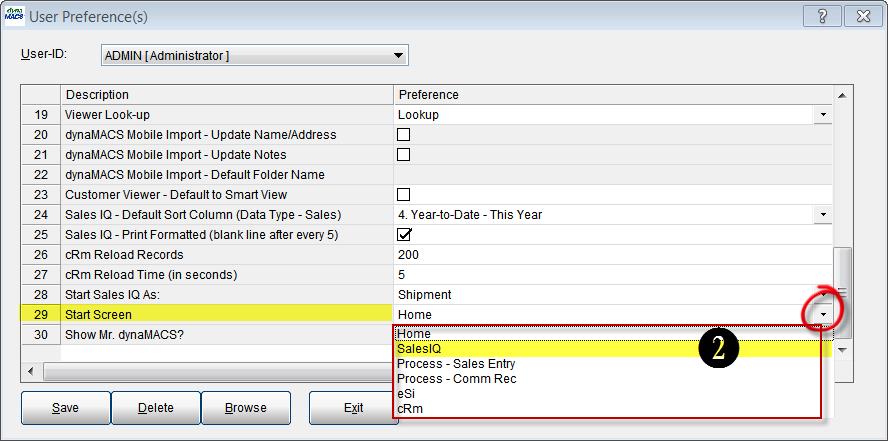
- From the User Preferences screen go to field 29 – Start screen. Select the down arrow to the right under the Preference column. This will display all of the start options available. Select SalesIQ from the drop down list and select the Save button and then the Exit button. The next time you log into dynaMACS you will be in the Sales IQ screen.


Setting the Sales IQ Screen Source Default
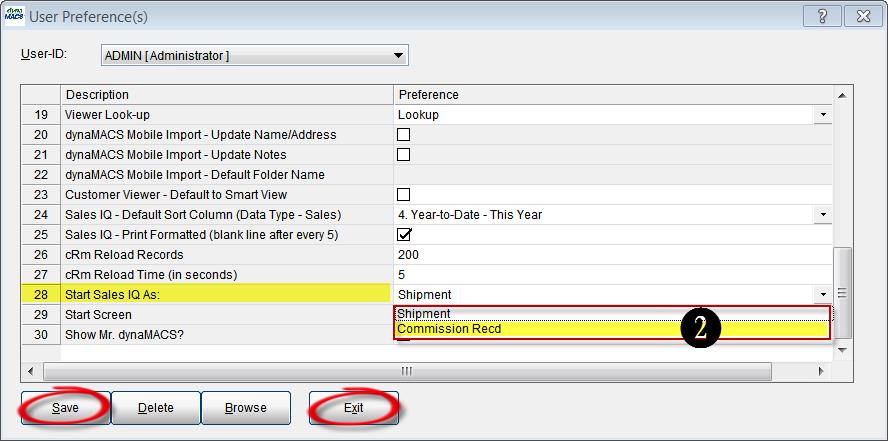
You can choose to have the Sales IQ screen start with the Source field defaulted to Sales OR Commission Received by setting it in the Preferences screen. In the following example we will change the preference to start Sales IQ with the source of Commission Recd.
- From the main dynaMACS screen select File>Preferences.
- From the User Preferences screen go to field 28 – Start Sales IQ As:. Select the down arrow to the right under the Preference column. This will display all of the start options available. Select Commission Recd from the drop down list and select the Save button and then the Exit button. The next time you log into Sales IQ the source will be defaulted to Commission Recd.