Tip #1712 – How to Delete a Customer from the dynaMACS Database
Follow the steps below to delete a customer that has merged with another customer or is no longer in business.
Move the history to another customer
- Go to Edit drop-down menu.
- Select File Transfer/Combine.
- Choose Mfr/Cst/Rep Transfer (1).
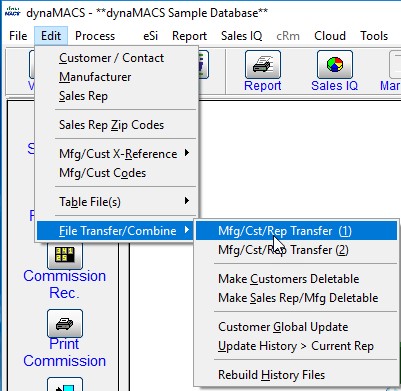
- The Manufacturer/Customer/Sales Rep Transfer/Combine window will appear.
- Type in the customer that you want to delete on the left side (Example: Abbott Health Products) and the customer that you want the history to go to on the right side (American Instruments).
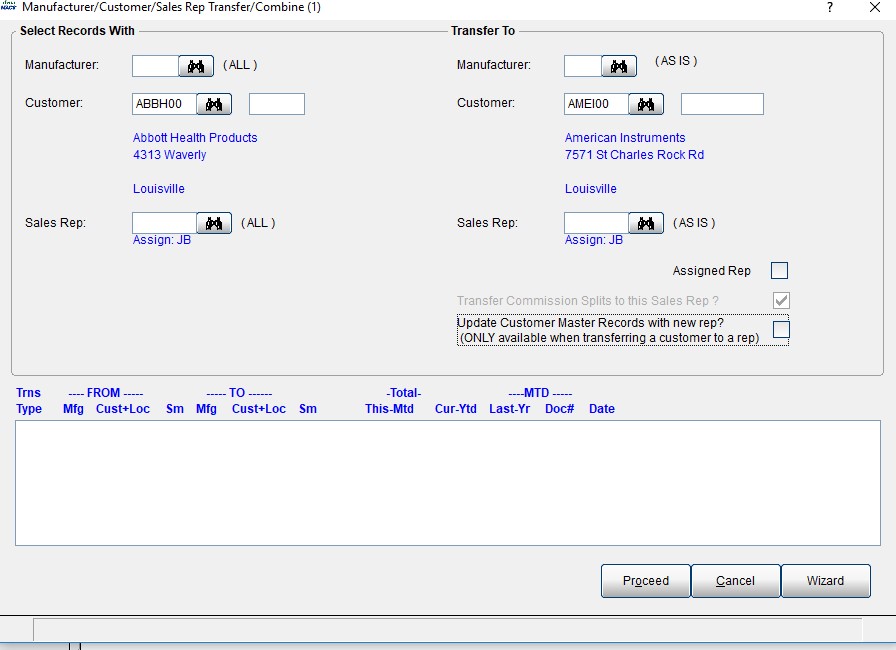
- Select the Proceed.
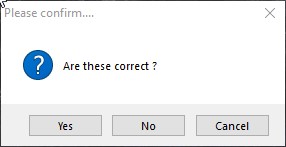
- Choose Yes at the prompt for Are these correct?
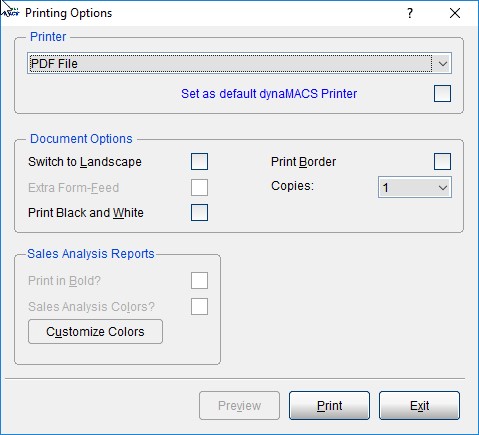
- Select the printer and print out the audit trail.
- Please confirm … choose Yes.
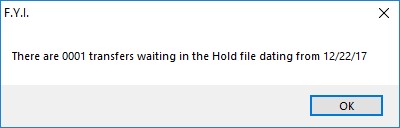
- The FYI window will appear, select OK.

- At the 2nd FYI, choose OK.
- Follow steps 1-11 until you are done will moving the customers.
- Then select Cancel to exit this screen.
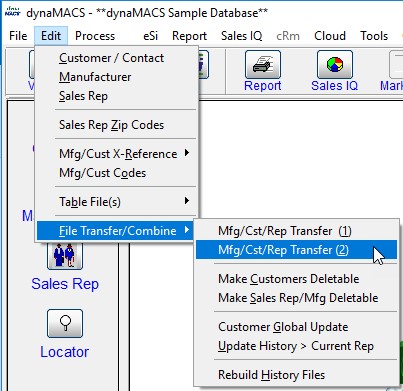
- Go to Edit drop-down menu.
- Select File Transfer/Combine.
- Choose Mfr/Cst/Rep Transfer (2).
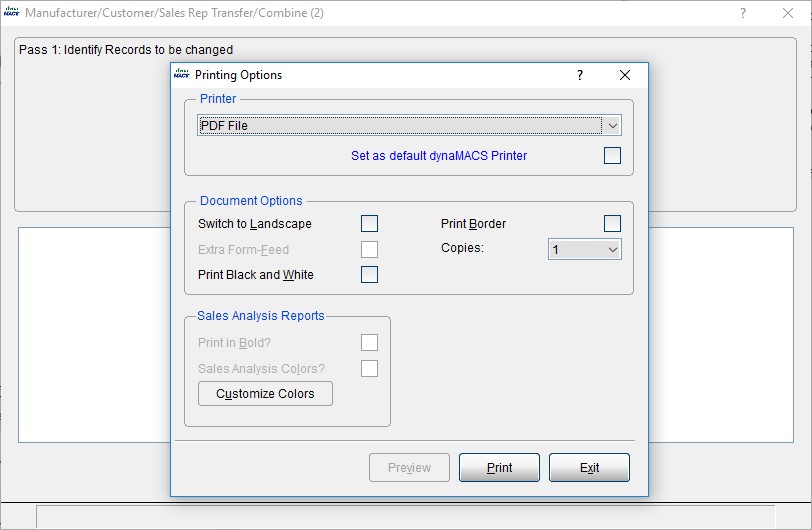
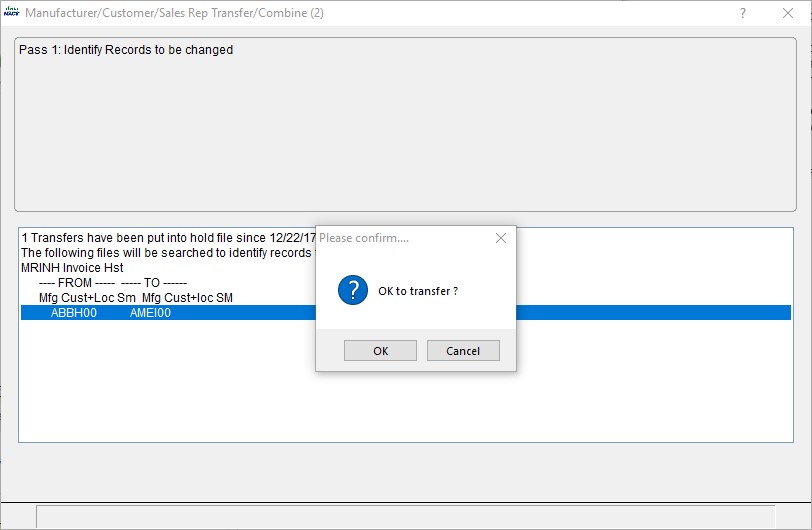
- The Manufacturer/Customer/Sales Rep Transfer/Combine (2) screen will appear.
- Select your printer and print the audit trail.
- Choose OK at the Please confirm window.
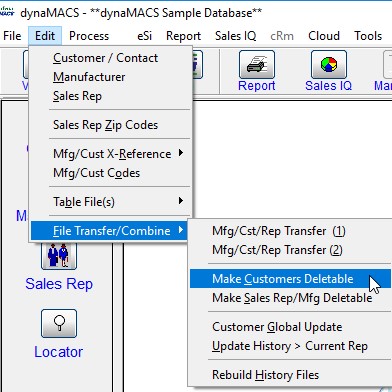
- Go to Edit drop-down menu.
- Select File Transfer/Combine.
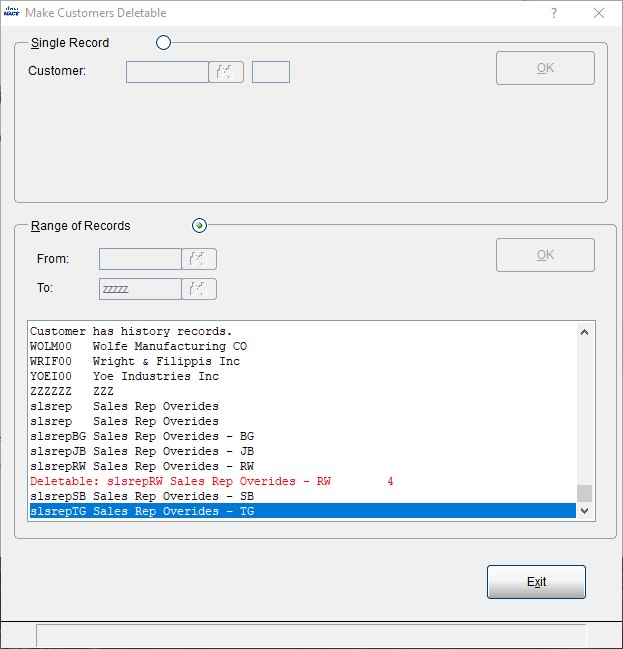
- Make Customer Deletable
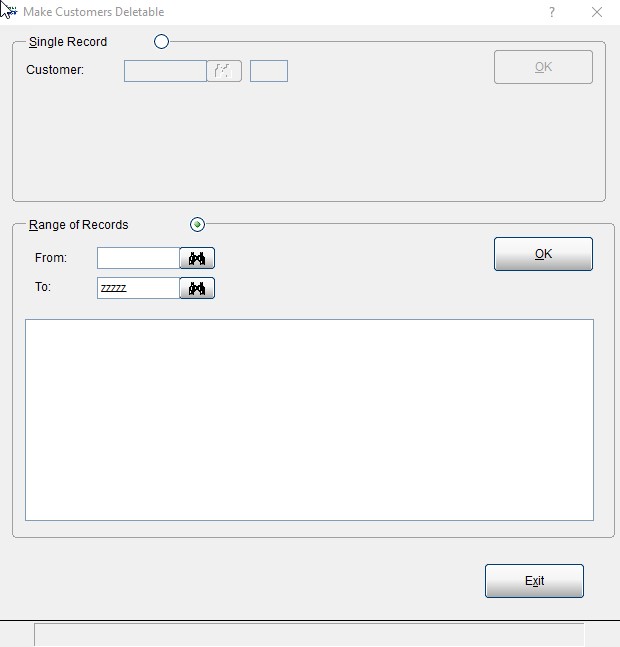
- Select Range of Records. Leave the from field blank and type in zzzz in the To field. Then choose OK.
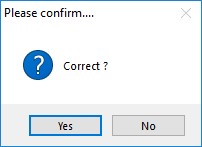
- Select Yes at the next window.
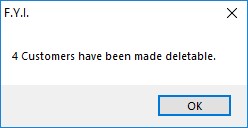
- At the end you will get a message that tells you how many customers were deletable. Choose OK.
- Select Exit when done.
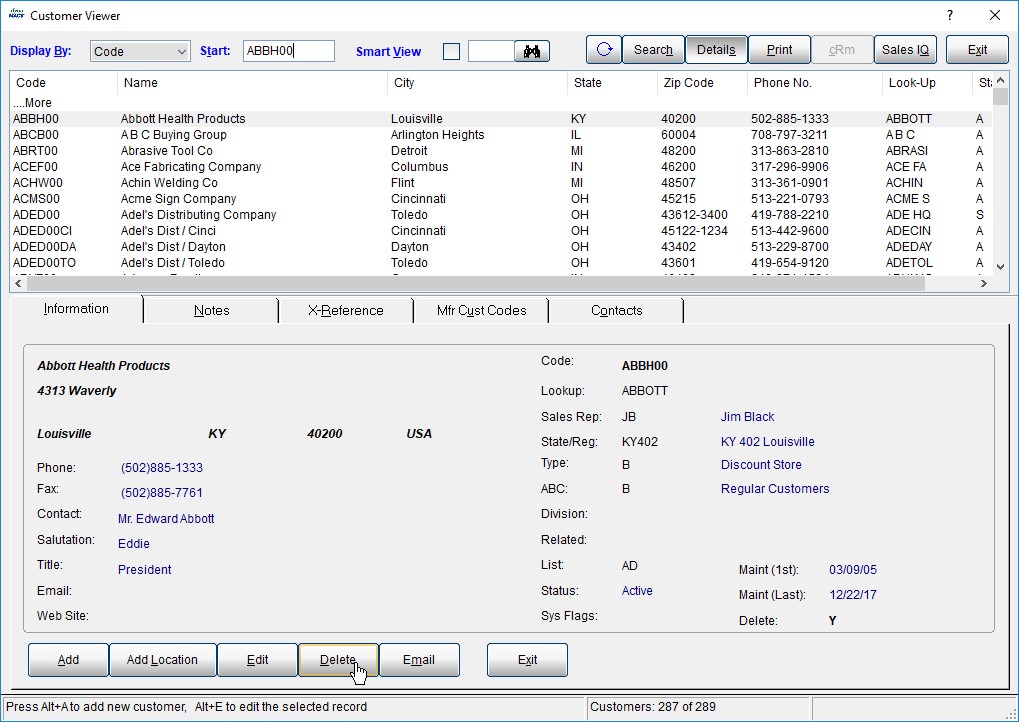
- Go into the Customer Maintenance screen and select one of the customers that you transferred the history for and select the Delete button.