Posts

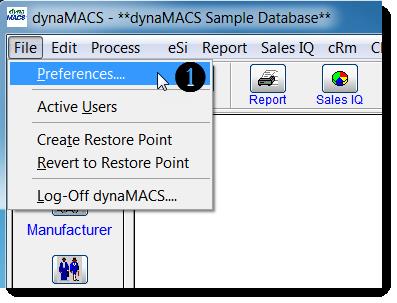
Video Tip – How to create a restore point

dynaMACS has a “mini backup” for sales rep agencies’ convenience

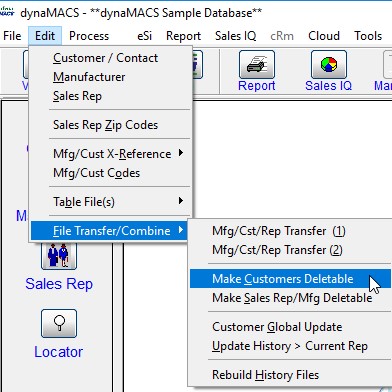
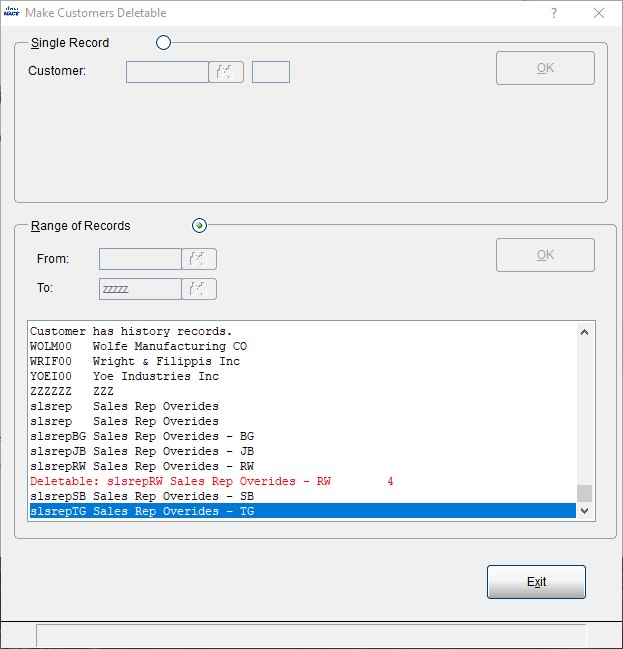
dynaMACS has created a restore point utility to help save time if you need to revert back to a prior period and start over again.  For example:  Posted a session to the wrong month, posted a commission statement to the wrong manufacturer or transferring history to the wrong customer/manufacturer or sales rep.

This DOES NOT replace an offsite backup.  The restore point is located in the same directory as your dynaMACS Software.  This means that if your dynaMACS folder crashes then all the restore points will not work.


Watch the Create a Restore Point Video Below:

For written instructions visit Tip #1308.

Offering solutions that you requested


AccountManager 365 Add-In(CRM from your inbox):

  1. Sell from Microsoft Outlook. Update your opportunities, contacts, accounts and more right in your Outlook in-box on your PC, Mac or phone.
  2. Contacts in one place. Update your contacts in Outlook from the AccountManager Add-in and the other applications will update.
  3. Unclutter your Outlook folders. Email Attachments sync over to AccountManager. One place to find the information you are looking for.
  4. Use the Planner to help organize your team’s workflow. Use the planner to help your team work smarter not harder.


Missed the other blogs regarding our extended capabilities:

AccountManager (CRM)

SalesAnalysis (Sales, Commission and Order Management)

Contact us today to learn more!


Tip #1712 – How to Delete a Customer from the dynaMACS Database

Follow the steps below to delete a customer that has merged with another customer or is no longer in business.

Move the history to another customer

  1. Go to Edit drop-down menu.
  2. Select File Transfer/Combine.
  3. Choose Mfr/Cst/Rep Transfer (1).
  4. The Manufacturer/Customer/Sales Rep Transfer/Combine window will appear.
  5. Type in the customer that you want to delete on the left side (Example:  Abbott Health Products) and the customer that you want the history to go to on the right side (American Instruments).
  6. Select the Proceed.
  7. Choose Yes at the prompt for Are these correct?
  8. Select the printer and print out the audit trail.
  9. Please confirm … choose Yes.
  10. The FYI window will appear, select OK.
  11. At the 2nd FYI, choose OK.
  12. Follow steps 1-11 until you are done will moving the customers.
  13. Then select Cancel to exit this screen.
  14. Go to Edit drop-down menu.
  15. Select File Transfer/Combine.
  16. Choose Mfr/Cst/Rep Transfer (2).
  17. The Manufacturer/Customer/Sales Rep Transfer/Combine (2) screen will appear.
  18. Select your printer and print the audit trail.
  19. Choose OK at the Please confirm window.
  20. Go to Edit drop-down menu.
  21. Select File Transfer/Combine.
  22. Make Customer Deletable
  23. Select Range of Records.  Leave the from field blank and type in zzzz in the To field. Then choose OK.
  24. Select Yes at the next window.
  25. At the end you will get a message that tells you how many customers were deletable. Choose OK.
  26. Select Exit when done.
  27. Go into the Customer Maintenance screen and select one of the customers that you transferred the history for and select the Delete button.

Tip #1709 – Using dynaMACS’ Sales IQ Graph to Show the difference in “House” Commission percentages for this year versus last year

In our previous tip #1708 we talked about using dynaMACS’ Sales IQ to analyze “House” commission. The following will show you how to create a graph from that information.

Using the Graphing Feature in dynaMACS

  1.  From the Sales IQ screen select the Filter button.
  2.  Select Active from the Manufacturer Status drop down list.
  3.  Select the Apply button.
  4. From the Sales IQ screen with your selections displayed, click on the down arrow to the right of the Graph button and select Graph.
  5. Check the boxes for Jan-Aug 19 and Jan-Aug 18 in the Select Columns to Graph screen.
  6. Once you have made your selections click on the Graph button in the lower left hand corner of the screen.
  7. The graph will default to a bar chart.  Select the Customize button to change the type of graph that will appear.
  8. Select the Line chart (or Pie etc.) to customize the look of your graph.
  9. When you have completed your selections select the OK button.

From the Sales IQ Graph screen you can:

  1.  Print the graph.
  2. Customize the look of the graph.
  3. Copy to Clipboard.

Tip #1708 – Using dynaMACS’ SalesIQ to Analyze “House” Commissions

dynaMACS’ Sales IQ provides a unique method for analyzing your agency sales and commission numbers.  House commissions are the agency commissions remaining after paying all the sales reps their split of the commissions.

Use the “Data” Control to Display Your “House” Commissions.

In the following example we show data for Agency Commission + Agency Splits listed by manufacturer as of October 2019.  This allows you to examine the total agency commissions and the remaining “House” commissions.

  1.  From the dynaMACS main screen, select the Sales IQ button.
  2.  Select AgyComm + AgySplit from the Data drop down list in the Parameters section of the screen.
  3. We have selected October 2019 from the As-of drop down list in the Parameters section of the screen.
  4. Select the Manufacturers tab.
  5. This column represents the total agency commission amount for Jan-Oct 2019.
  6. This column represents the total agency “House” commission amount for Jan-Oct 2019 after paying the sales reps.

Tip #1706 – Are you constantly changing the “display by” search in the customer viewer?

The Display By field in the dynaMACS Viewer screens defaults to “Lookup” which lets you enter the first few characters of the Name i.e. manufacturer, customer or sales rep name in the Start field which will display a list based on that entry.

You can change this default temporarily by selecting the down arrow in the Display By field while in the Viewer screen.  This will change the Display By for the current viewing session.

You can also change the default so that every time you access the Viewer screens it will default to your personal selection.

To Change the Default Display By Field for the Viewer Screens

  1.  From the main dynaMACS screen select File>Preferences.

  2. From the User Preference(s) screen, scroll down to #19 Viewer Look-Up.
  3. Select the drop down arrow to the far right of Viewer Look-Up.
  4.  Select the field which you would like your default Viewer Look-Up to be ( i.e. City).
  5. Select the Save button.
  6. Select the Exit button.

Now when you access any of the viewer screens the Display By field will default to that selection.