Posts

Offering more options for your business


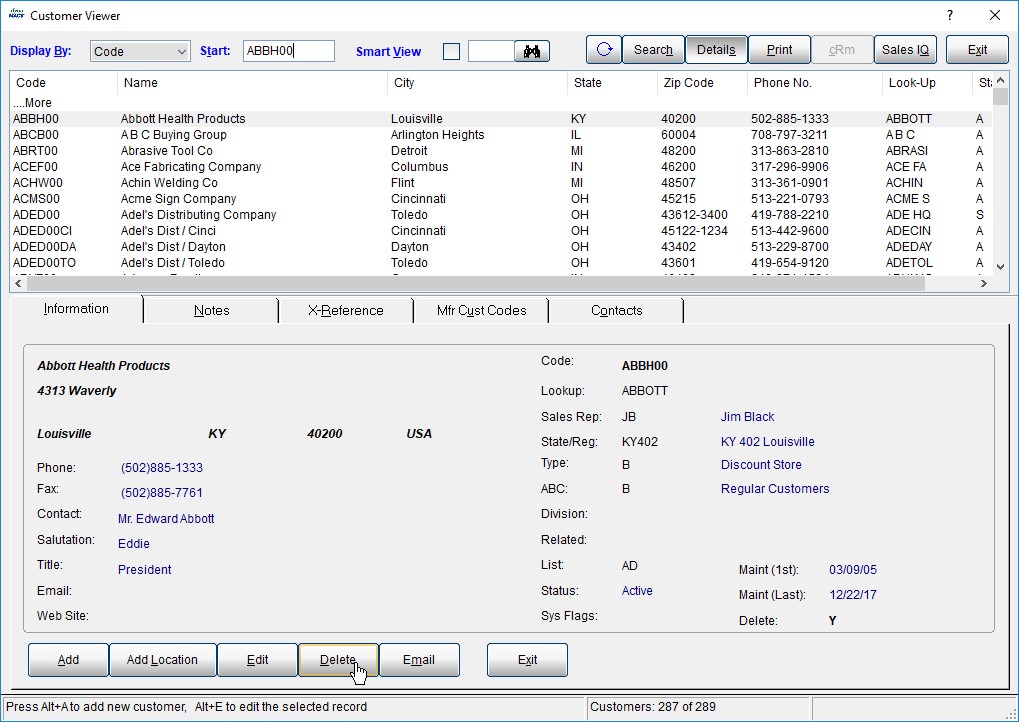
SalesAnalysis (Sales, Commission and Order Management):

  1. Line Item Details. Import a part number spreadsheet from your principal so it’s easy to add line item details.
  2. Order Tracking. Keep track of what items your customers buy and the quantities.
  3. Electronic Data Imports. Imports saves time and money.

Keep an eye out for more in our upcoming blog:

AccountManager Office 365 (CRM from your In-box)

If you can’t wait contact us today!

Tip #1712 – How to Delete a Customer from the dynaMACS Database

Follow the steps below to delete a customer that has merged with another customer or is no longer in business.

Move the history to another customer

  1. Go to Edit drop-down menu.
  2. Select File Transfer/Combine.
  3. Choose Mfr/Cst/Rep Transfer (1).
  4. The Manufacturer/Customer/Sales Rep Transfer/Combine window will appear.
  5. Type in the customer that you want to delete on the left side (Example:  Abbott Health Products) and the customer that you want the history to go to on the right side (American Instruments).
  6. Select the Proceed.
  7. Choose Yes at the prompt for Are these correct?
  8. Select the printer and print out the audit trail.
  9. Please confirm … choose Yes.
  10. The FYI window will appear, select OK.
  11. At the 2nd FYI, choose OK.
  12. Follow steps 1-11 until you are done will moving the customers.
  13. Then select Cancel to exit this screen.
  14. Go to Edit drop-down menu.
  15. Select File Transfer/Combine.
  16. Choose Mfr/Cst/Rep Transfer (2).
  17. The Manufacturer/Customer/Sales Rep Transfer/Combine (2) screen will appear.
  18. Select your printer and print the audit trail.
  19. Choose OK at the Please confirm window.
  20. Go to Edit drop-down menu.
  21. Select File Transfer/Combine.
  22. Make Customer Deletable
  23. Select Range of Records.  Leave the from field blank and type in zzzz in the To field. Then choose OK.
  24. Select Yes at the next window.
  25. At the end you will get a message that tells you how many customers were deletable. Choose OK.
  26. Select Exit when done.
  27. Go into the Customer Maintenance screen and select one of the customers that you transferred the history for and select the Delete button.

Tip #1709 – Using dynaMACS’ Sales IQ Graph to Show the difference in “House” Commission percentages for this year versus last year

In our previous tip #1708 we talked about using dynaMACS’ Sales IQ to analyze “House” commission. The following will show you how to create a graph from that information.

Using the Graphing Feature in dynaMACS

  1.  From the Sales IQ screen select the Filter button.
  2.  Select Active from the Manufacturer Status drop down list.
  3.  Select the Apply button.
  4. From the Sales IQ screen with your selections displayed, click on the down arrow to the right of the Graph button and select Graph.
  5. Check the boxes for Jan-Aug 19 and Jan-Aug 18 in the Select Columns to Graph screen.
  6. Once you have made your selections click on the Graph button in the lower left hand corner of the screen.
  7. The graph will default to a bar chart.  Select the Customize button to change the type of graph that will appear.
  8. Select the Line chart (or Pie etc.) to customize the look of your graph.
  9. When you have completed your selections select the OK button.

From the Sales IQ Graph screen you can:

  1.  Print the graph.
  2. Customize the look of the graph.
  3. Copy to Clipboard.

Tip #1708 – Using dynaMACS’ SalesIQ to Analyze “House” Commissions

dynaMACS’ Sales IQ provides a unique method for analyzing your agency sales and commission numbers.  House commissions are the agency commissions remaining after paying all the sales reps their split of the commissions.

Use the “Data” Control to Display Your “House” Commissions.

In the following example we show data for Agency Commission + Agency Splits listed by manufacturer as of October 2019.  This allows you to examine the total agency commissions and the remaining “House” commissions.

  1.  From the dynaMACS main screen, select the Sales IQ button.
  2.  Select AgyComm + AgySplit from the Data drop down list in the Parameters section of the screen.
  3. We have selected October 2019 from the As-of drop down list in the Parameters section of the screen.
  4. Select the Manufacturers tab.
  5. This column represents the total agency commission amount for Jan-Oct 2019.
  6. This column represents the total agency “House” commission amount for Jan-Oct 2019 after paying the sales reps.

Tip #1703 – Transferring a Portion of One Sales Rep Territory to Another Sales Rep

dynaMACS makes it easy when you are changing your agency territories.  Instead of moving one customer at a time, dynaMACS can move multiple customers at one time.

In the following example we will transfer all of sales rep Jim Black’s accounts in the state of Kentucky to the new sales rep Rick White.

Customer Global Update

First you must run the Customer Global Update.

  1.  From the main dynaMACS screen select Edit>File Transfer/Combine>Customer Global Update.
  2. Select the Yes button from the Restore Point? dialog box to create a restore point.
  3. In the Customer Global Change screen enter the state code “KY” in the State field.
  4. Enter the “from” sales rep code “JB in the Sales Rep field (old rep).
  5. Enter the “to” sales rep code “RW” in the next Sales Rep field to the right (new rep).
  6. Select the Update button.
  7. Select the Print button from the Printing Options dialog box to print the Audit Trail report.
  8. This report shows a list of the customers that will be transferred from sales rep “JB” (Jim Black) to sales rep “RW” (Rick White).
  9. After reviewing the Audit Report select the Yes button to continue.

    Transfer Sales and Commission History to New Rep

    1.  From the main dynaMACS screen select Edit>File Transfer/Combine>Mfg/Cst/Rep Transfer (1).

    2.  From the Manufacturer/Customer/Sales Rep Transfer/Combine (1) screen select the Wizard button at the bottom right hand corner which will redirect you to the Wizard screen.  You will be prompted to create another Restore Point.

    3.  Select Sales Rep from the drop down list for the field: I want to transfer or combine all data for a:.  Select Sales Rep and for the field: To a different.  Then select the Proceed to Selection button.
    4.  Enter the Sales Rep code that you are transferring from under Transfer Data From i.e. “JB”.
    5.  If you wish to transfer the sales rep splits, check the box Transfer Commission Splits to this Sales Rep?
    6.  Select the Proceed button.
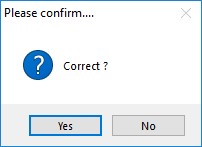
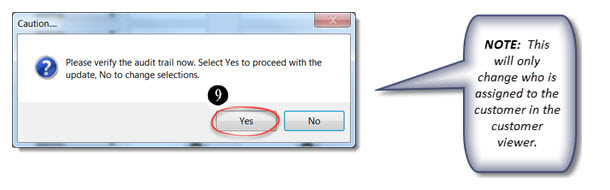
    7.  Select the Yes button on the Please Confirm dialog box.

    8.  From the Printing Options screen select your printer and then select the Print button.

    9.  Review the report and then select the Yes button to complete the transfer.

    10.  Select the OK button after all records have been transferred.

    11.  From the main dynaMACS screen select Edit>File Transfer/Combine>Mfg/Cst/Rep Transfer (2).

    12.  Print the report when prompted by selecting the Print button.
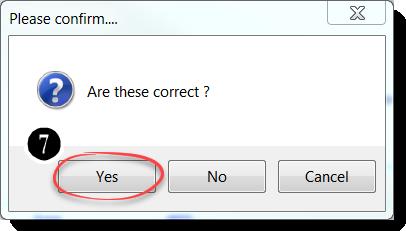
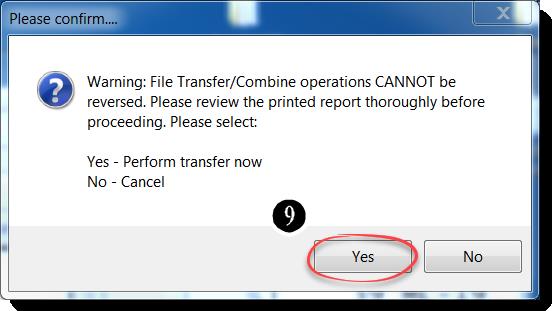
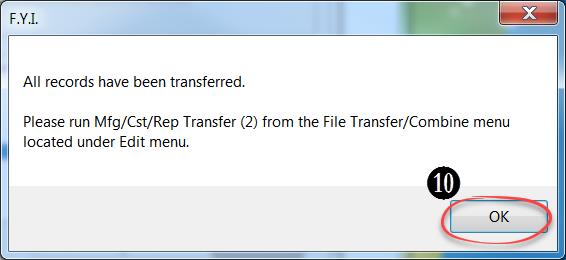
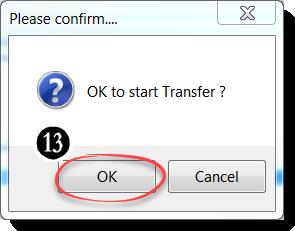
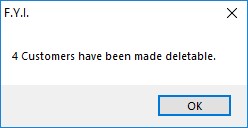
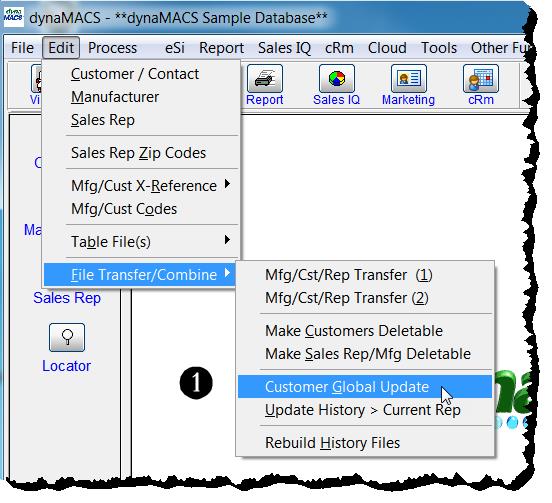
    13.  Select the OK button on the Please Confirm dialog box to complete the transfer.

Tip #1612 – Using the dynaMACS System Information Setup Screen to Set the Frequency and Warning Messages for Restore Points

Restore points in dynaMACS are important when performing some functions such as posting sessions or doing transfers. (Please see Tip #1308 on the importance of creating a restore point.)  In dynaMACS you can control when your Restore Points are required or set a warning when the Restore Point SHOULD be done.  The following tip will walk you through setting this up.

Setting the Restore Point Frequency/Warning Message

  1. From the main dynaMACS screen select Other Functions>Administration>System Information Setup.
  2. Select the Restore Points tab at the top of the System Information Setup screen.
  3. There are three processes for which you can setup warnings or required defaults.
  4. Select the appropriate radio button.
    • Required Everytime will force the user to create a restore point each time this process is run.
    • Required Once Daily will force the user to create a restore point the first time this process is run each day.
    • Warning Everytime will display a warning to create a restore point each time this process is run.
    • Warning Once Daily will display a warning to create a restore point the first time this process is run each day.
    • Never will not show a warning or force a restore point when this process is run.

5.   Once your selections have been made click on the Save button.