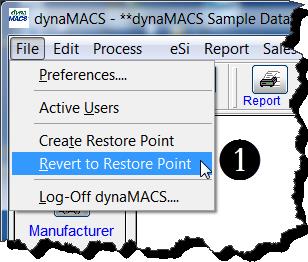
Tip #1401 – dynaMACS File Transfer/Combine Wizard
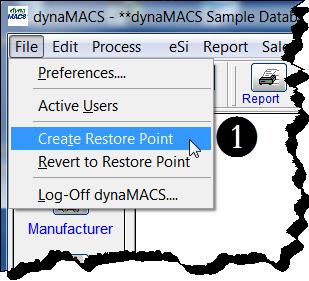
The Mfg/Cst/Rep Transfer (1)screen has been modified to include a “wizard” button which when selected will help make the transfer process easier for you.
Old Screen . . .

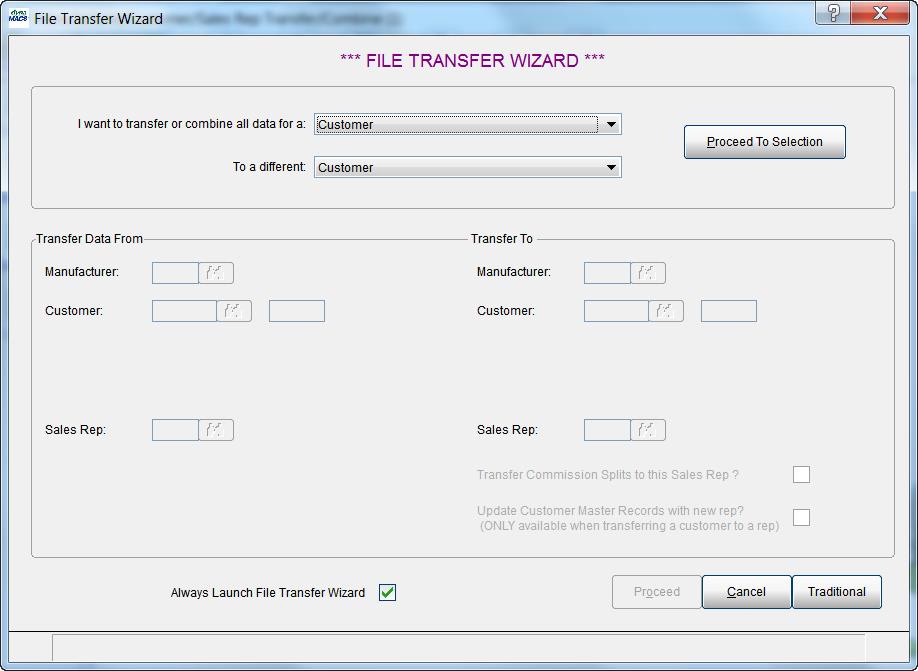
New Screen . . .
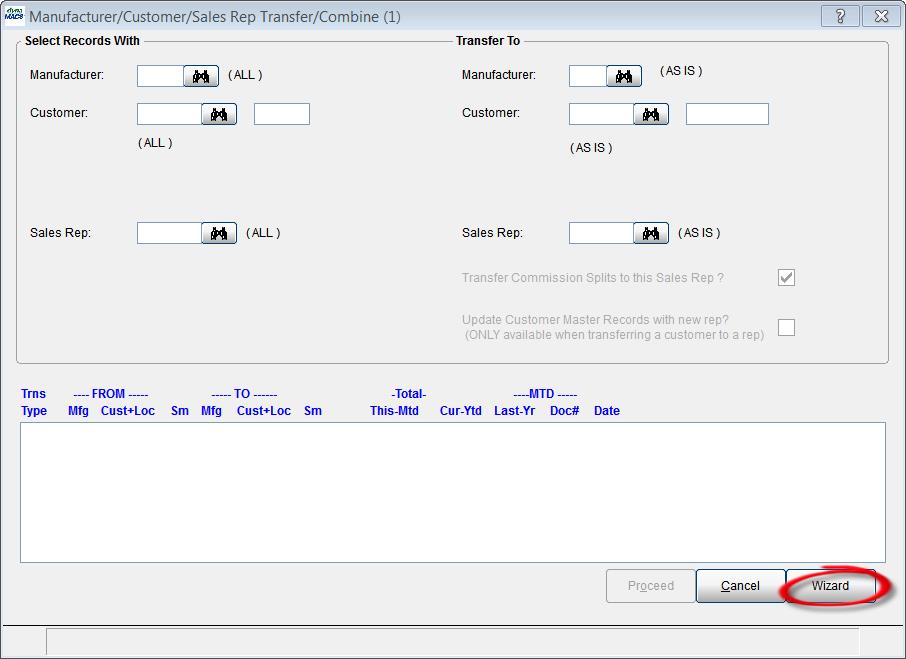
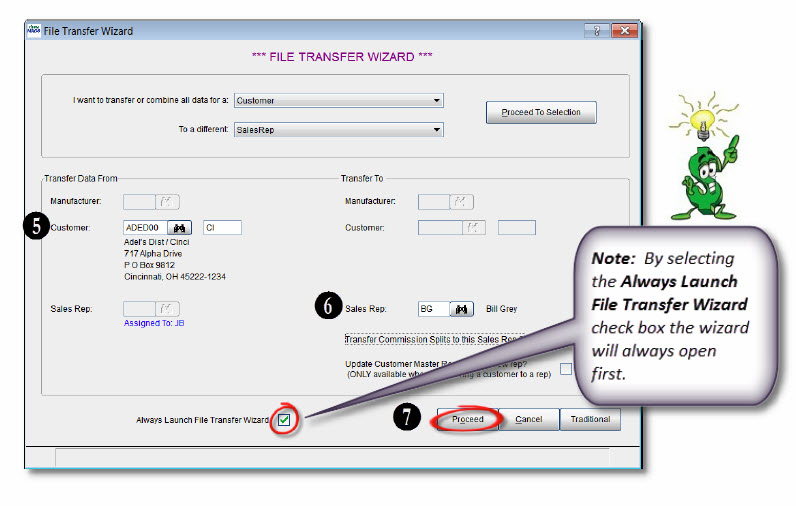
When selecting the Wizard button the File Transfer Wizard screen will open. This screen is designed to help ease you through the File Transfer/Combine process.
Example
In the following example we will transfer all data from a customer to a new sales rep.
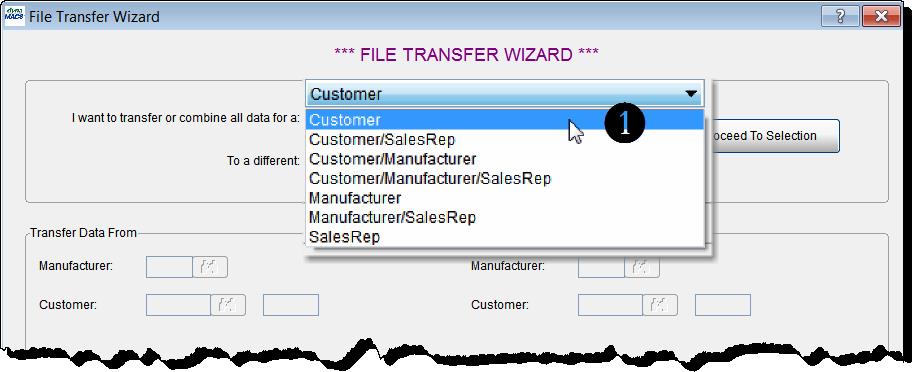
- From the File Transfer Wizard screen select the Customer option from the drop down list in the I Want to Transfer or Combine all data for a:
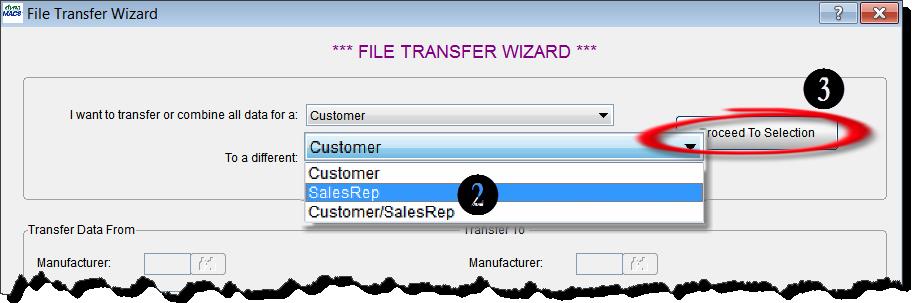
- Select the SalesRep option from the drop down list in the To a different:field.
- Select the Proceed To Selection button.
- You will notice that after selecting the Proceed To Selection button, the Customer field and the Sales Rep field have been activated in the Transfer Data From and Transfer Data To section of the screen.This screen is very similar to the regular File Transfer/Combine (1) screen, only it will take the guess work out of it by allowing you to only enter data into the fields that have been activated based on your selections in the upper portion of the screen.
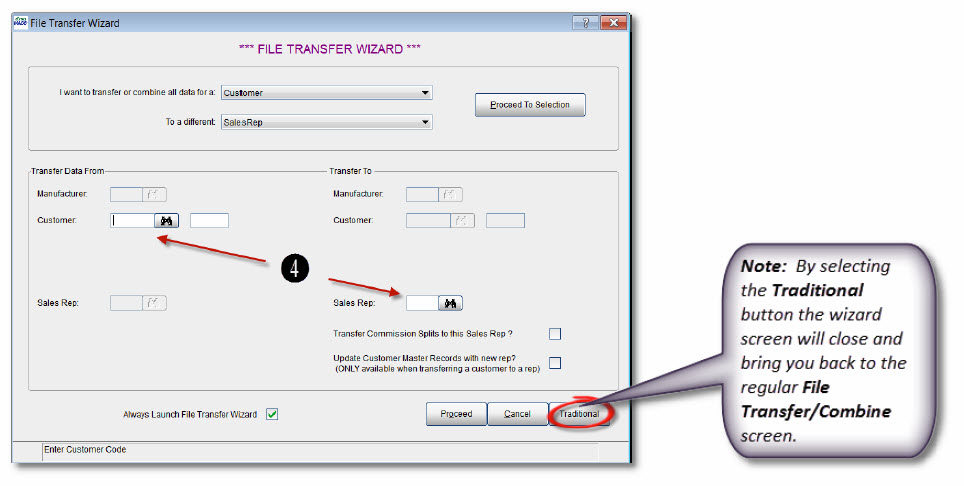
- Enter the Customer Code or use the Search button to find the code.In this example we will use Adel’s Dist ADED00 location Cincinnati>CI.
- For the Sales Rep we will use BG for Bill Grey.
- Select the Proceed button.At this point the file transfer process will proceed as normal.